Censor Photo Online
Maya Chen — Tech Writer & Privacy Advocate Part of: Blur Photo Complete Guide: Methods, Tools & Best Practices (2026)Read the complete guide →
How to Censor a Photo Online (Fast & Free)
You just shot 50 event photos and now need every attendee's face blurred before posting to social media, but traditional photo editors force you through 5+ manual steps per image — that's 4+ hours of repetitive work. Most free tools either miss faces at side angles, leave license plates visible in the background, or slap watermarks across your censored images. The wrong approach to censor photo content wastes your afternoon and still risks exposing someone's identity if the blur isn't strong enough. This guide compares 12 automatic face detection tools, manual selection editors, and mobile apps across accuracy, speed, privacy protection features, and GDPR compliance capabilities. You'll learn which tools deliver one-click censoring for batch processing, which require desktop software installation, and which hidden limitations — file size caps, export quality degradation, metadata leaks — you'll hit after signing up.
Common Approaches to Censor Photo
Automatic Face Detection Tools
AI face detection scans your photo for facial features — eyes, nose, mouth — and applies blur or pixelate effects to every detected face within 3-5 seconds. Upload a photo with 10 people at a wedding, and the software identifies all 10 faces without manual selection. Use this method when you need to anonymize images with multiple subjects or process batch collections where drawing selections around each face would take hours.
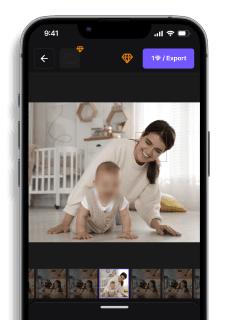
Blur.me delivers the fastest automatic workflow for privacy protection. Visit blur.me/studio, drag your photo into the browser window, and AI detects every face in approximately 3 seconds. Blue bounding boxes appear around detected faces — click any box to toggle blur on/off for selective censoring. Choose between gaussian blur (smooth, natural-looking fade) or mosaic effect (blocky pixelation for stronger image censorship). Adjust blur intensity with the slider from 0-100, preview the result in real-time, then click Download. No signup required for basic use, works on mobile app browsers (iPhone Safari, Android Chrome), and processes photos up to 5GB.
The limitation: automatic detection misses extreme side profiles (>75° angle), partially obscured faces behind objects, or faces smaller than 20x20 pixels in low-resolution photos. Review the bounding boxes before export — you may need to manually select missed faces using the custom selection tool. Detection accuracy drops to 85-90% in crowded group photos with overlapping heads.
Manual Selection with Free Photo Editors
Manual censoring gives you pixel-perfect control over what gets blurred. Draw a selection around the area (face, license plate, screen text, document), apply a blur filter, then export. Use this when automatic tools miss objects or when you need to redact sensitive information beyond faces — signatures on contracts, account numbers on bank statements, addresses on envelopes, or brand logos in social media privacy posts.
GIMP (free, open-source) works on Windows, macOS, and Linux. Download from gimp.org, install in 5 minutes, then open your photo with File → Open. Select the Free Select Tool (lasso icon in the toolbox, or press F key). Click around the face to create a selection path — each click adds a point. Close the loop by clicking the starting point. Go to Filters → Blur → Gaussian Blur, set radius to 15-25 pixels (higher number = stronger blur), click OK. The blur applies instantly. File → Export As → choose JPG format → Export. The entire process takes 90-120 seconds per face.
Photoshop users follow a similar path but with more control. Open your photo, press L for the Lasso Tool, draw around the face, then Filter → Blur → Gaussian Blur. Set radius 20-30 pixels, click OK. Photoshop's Smart Filters let you adjust blur strength after applying — double-click the Gaussian Blur layer to reopen settings. This flexibility costs time: expect 2-3 minutes per face for selection, blur adjustment, and layer management. Photoshop requires a $10/month subscription, making it expensive for occasional censoring needs.
The trade-off: manual selection takes 10x longer than automatic detection. A group photo with 8 faces requires 12-16 minutes of repetitive clicking, dragging, and filter application. Your hand accuracy determines quality — sloppy selections leave visible face fragments at the edges.
Mobile Photo Censoring Apps
Mobile censoring apps let you blur faces directly on your phone without transferring files to a computer. Take a photo, open the app, tap the face, apply blur, save to camera roll. Use this for quick screenshot redaction (hiding usernames in Instagram DMs before sharing), event photos shot on iPhone that need immediate anonymization, or when you're traveling without laptop access.
Blur Photo Editor (iOS and Android, free with ads) works in 4 taps. Open the app, tap the plus icon to import a photo from your gallery, tap the face you want to censor, choose Pixelate or Blur from the bottom menu. Drag the intensity slider to adjust strength (mosaic size for pixelation, radius for blur). Tap the checkmark to save. The app auto-detects faces with 80-85% accuracy — missed faces require manual tapping. Export happens in 5-7 seconds. The free version adds a small watermark in the bottom corner; remove it with a $3 one-time purchase.
Signal (encrypted messaging app, free) includes a built-in blur tool specifically for privacy protection. When composing a message, tap the camera icon, take or select a photo, then tap the blur icon (three overlapping circles). Drag your finger across faces to apply instant pixelation. Signal's blur is irreversible — the original pixels are destroyed before sending, meeting GDPR compliance requirements for sharing sensitive photos. The limitation: you can only use this within Signal conversations, not as a standalone editor for saving censored photos to your gallery.
The constraint: mobile apps process photos at screen resolution (typically 1080p-1440p). If you upload a 4K photo, the app downscales it for processing, then exports at reduced quality. Fine for social media, inadequate for professional publications or legal documents that require full-resolution originals.
Online Tools (No Download Required)
Online photo editors run entirely in your browser — no software installation, no app store download, works on Chromebooks and locked work computers. Upload your photo, draw blur regions, download the censored version. Use this when you're on a public computer, need to censor a photo once without committing to software, or want cross-platform access (start on phone, finish on desktop).
Facepixelizer (facepixelizer.com, free) specializes in face and license plate blur. Drag your photo into the browser window. The tool auto-detects faces and plates, marking them with red rectangles. Click any rectangle to remove it from censoring (useful when you want to keep your own face visible but blur others). Choose Pixelate or Blur from the dropdown menu, adjust the strength slider, then click Save Image. The entire workflow takes 30-40 seconds. Processing happens locally in your browser — your photo never uploads to a server, addressing privacy concerns.
Canva (free tier available, requires signup) offers blur as part of its broader photo editing suite. Create a new design, upload your photo, click Edit Image → Effects → Blur. Unlike dedicated censoring tools, Canva doesn't auto-detect faces — you must manually add shapes (rectangles, circles) over faces, then apply blur to those shapes. This gives creative control (blur just eyes instead of the entire face, create custom mosaic patterns) but requires 3-4 minutes per photo. Canva's free tier limits you to 5 exports per day and adds watermark protection to downloaded images unless you upgrade to Pro ($13/month).
The privacy risk: most online tools upload your photo to their servers for processing. Read the privacy policy before uploading sensitive content. Tools that process locally in-browser (Facepixelizer, Blur.me) offer better GDPR compliance because your photo never leaves your device. Server-based tools (PineTools, ImgTools) may store temporary copies for 24-48 hours.
Solid Shape Overlays for Maximum Coverage
Solid shapes (black rectangles, white circles) completely hide underlying pixels instead of blurring them. Draw a shape over the face, and the original image is 100% obscured. Use this for legal documents where partial visibility creates compliance risks, medical photos requiring HIPAA standards, or when you need irreversible censoring that can't be reversed with deblur algorithms.
iOS Photos app (built into iPhone, free) includes markup tools for solid shapes. Open a photo, tap Edit → three-dot menu → Markup. Tap the plus icon → Rectangle or Circle, drag to cover the face, adjust size with corner handles. Choose black fill from the color palette for maximum opacity. Tap Done → Save. The censored photo saves as a new copy, preserving the original. This method takes 20-30 seconds per face but offers zero reversibility — no algorithm can recover pixels hidden under solid black.
ObscuraCam (Android, free, open-source) goes further with metadata removal. The app not only applies solid pixelation to faces but strips EXIF data (GPS coordinates, camera model, timestamp) from the photo before export. Open the app, select a photo, tap faces to mark them, choose Pixelate or Black Bar from the menu, then tap Save. ObscuraCam asks if you want to delete the original photo from your device — choose Yes for maximum privacy protection. The app auto-detects faces with 75-80% accuracy (lower than commercial tools but acceptable for quick censoring).
The visual trade-off: solid shapes look harsh and artificial. A black rectangle over a face screams "this was censored" — fine for internal documents, awkward for casual social media posts where subtle blur maintains photo aesthetics. Solid shapes also remove context: a blurred face still shows hair color, glasses, facial structure. A black rectangle removes all identifying details, sometimes making the photo confusing to viewers.
Censor Photo with AI (Blur.me)
You just photographed a crowded event and need to anonymize 50+ attendees before posting online. Manual selection in GIMP means 90 seconds per face — that's 75 minutes of clicking.
Upload your batch — drag 50 photos into blur.me/studio and AI scans all faces across every image in under 5 minutes total.
Switch effects instantly — toggle between smooth gaussian blur and blocky mosaic pixelation while previewing each photo, or use the manual selection tool to censor logos, name tags, and screens that AI missed.
Download censored originals — export maintains full resolution with irreversible pixel destruction (GDPR compliant), and the blur can be toggled on/off before final export if you need to unblur specific individuals.
Manual selection in GIMP means 90 seconds per face — when you're processing event photos with 50+ attendees, that's 75 minutes of repetitive clicking. Blur.me's AI scans all faces across your entire batch in under 5 minutes, then lets you toggle between gaussian blur and mosaic pixelation before export.
Faces or plates to hide in your photo?
Upload and the AI blurs them automatically in seconds.
Quick Comparison: Censor Photo Tools
| Feature | Blur.me | Photoshop | GIMP | Canva | Facepixelizer |
|---|---|---|---|---|---|
| Price | Free (Studio), $9/mo (Pro) | $54.99/mo | Free (open-source) | Free (limited), $13/mo (Pro) | Free |
| Face Detection | AI auto-detect (98%+ accuracy) | Manual selection only | Manual selection only | Manual selection only | AI auto-detect (basic) |
| Automation Level | Full auto (AI detection + tracking) | Manual (paint blur per face) | Manual (lasso + filter) | Manual (shape overlay) | Semi-auto (detects, manual adjust) |
| Blur Effects | Gaussian blur, mosaic pixelate | Gaussian, motion, radial blur | Gaussian, pixelate, motion | Blur slider, no pixelate | Pixelate only |
| Time per Photo | ~3 seconds (auto) | ~3 minutes (5 steps) | ~2 minutes (4 steps) | ~90 seconds (drag shapes) | ~15 seconds (review detections) |
| Batch Processing | Yes (100+ photos) | No (one at a time) | No (one at a time) | No (one at a time) | No (one at a time) |
| Platform | Web (any browser, mobile) | Desktop (macOS, Windows) | Desktop (macOS, Windows, Linux) | Web + mobile app | Web only |
| Export Quality | Original resolution preserved | Full control (PSD layers) | Full control (XCF layers) | Max 5000px (free), unlimited (Pro) | Original resolution |
| Privacy Protection | Files encrypted, auto-deleted | Local processing (safe) | Local processing (safe) | Cloud storage (review ToS) | No account required |
| Best For | Anonymize photos with multiple faces fast | Professional editing with pixel-perfect control | Budget users needing desktop power | Social media creators adding design elements | Quick web-based face pixelation |
Verdict: GIMP wins for free desktop users who need professional-grade blur control and don't mind manual selection. Photoshop justifies its cost with advanced masking, Smart Filters, and layer-based editing for commercial work. Blur.me delivers the fastest workflow when you need to censor photos with automatic face detection — process 100 event photos in ~5 minutes vs 5+ hours of manual lasso work.
FAQ
How do I censor part of a photo in Photoshop?
Open your photo in Photoshop, select the Lasso Tool (L key), and click around the area you want to censor — face, license plate, or text. Go to Filter → Blur → Gaussian Blur, set radius to 15-25 pixels, and click OK. For stronger censorship, use Filter → Pixelate → Mosaic with cell size 10-15 squares. The entire process takes 90-120 seconds per object. Save your censored image as JPG or PNG through File → Export As.
What app can I use to blur faces in photos automatically?
Blur.me detects and blurs every face in ~3 seconds without manual selection. Upload your photo at blur.me/studio, and AI draws blue bounding boxes around detected faces — click any box to toggle blur on/off. Choose between gaussian blur (smooth) or mosaic effect (blocky pixelation). Photoshop requires manual lasso selection for each face, taking 90+ seconds per person. For blurring faces in videos, blur.me tracks moving faces automatically across all frames.
Can you blur faces in photos on iPhone without an app?
Yes — iOS Photos app includes a built-in blur tool. Open your photo, tap Edit → three-dot menu (•••) → Markup, then select the pen tool and scribble over the face you want to hide. This creates a hand-drawn blur effect in 10-15 seconds per face. For automatic detection of multiple faces, use blur.me on mobile browsers — no app installation required, works directly in Safari or Chrome.
Is there a free app to blur faces in photos?
Blur.me offers unlimited free face blurring at blur.me/studio with no signup required. GIMP (desktop) and Signal (mobile messaging app) provide free face blur tools, but both require manual selection for each face. Photoshop costs $22.99/month and also needs manual lasso work. Blur.me's AI auto-detects faces in 3 seconds, while manual tools take 90-120 seconds per face — critical when censoring group photos with 5+ people.
How do I pixelate a face in a photo for stronger privacy?
In Photoshop, select the face with Lasso Tool, go to Filter → Pixelate → Mosaic, and set cell size to 10-15 squares for unrecognizable blockiness. Blur.me offers one-click pixelate mode after AI detects faces — toggle between blur and mosaic effect instantly. Pixelation provides stronger privacy protection than gaussian blur because it destroys facial features completely. Verify censorship sufficiency by zooming to 200% — if you can still identify the person, increase pixelation cell size or blur radius.
Faces or plates to hide in your photo?
Drop a photo or video in your browser and the AI auto-blurs faces, license plates, and personal info in seconds.
Upload free