Blur Face: Easily Hide Faces in Photos with a Blur Effect
Maya Chen — Tech Writer & Privacy Advocate Part of: Blur Photo Complete Guide: Methods, Tools & Best Practices (2026)Read the complete guide →
Applying a face blur effect is one of the easiest ways to hide identity, protect someone’s privacy, or create a trendy hidden-face aesthetic in photos. Whether you're editing for social media, professional use, or personal sharing, knowing how to add a natural-looking blur effect to a face can make your images both safer and more visually polished. With modern AI tools, creating a clean face blur no longer requires advanced editing skills or complicated software. This guide walks you through how to blur a face in a photo quickly using a simple online method that works right in your browser.
78% of content creators spend over 5 minutes per photo manually masking faces with selection tools and layer effects. The face blur effect — a privacy-essential technique for protecting identities in images — becomes a tedious bottleneck when you're processing dozens of event photos or batch-editing social media content. Miss a single face in a public post and you risk GDPR fines, subject complaints, or platform takedowns. Manual methods in Photoshop or GIMP demand 6 separate steps per image: selection, feathering, filter application, layer merging, quality checks, and export adjustments. Mobile editors like Snapseed and Canva simplify the workflow but still require you to tap and drag a blur brush over every face individually. A faster approach exists — one that detects all faces in your photo automatically and applies consistent blur coverage in under 30 seconds, no matter how many people appear in the frame.
Common Approaches to Face Blur Effect
You have four main paths to blur faces in photos: manual editing tools, AI-powered apps, browser-based solutions, and mobile editors. Each method trades off between control, speed, and technical skill required.
Manual Editing in Photo Software
Adobe Photoshop and GIMP give you pixel-perfect control over blur placement and intensity. Use this method when you need professional-grade results or want to blur specific facial features (eyes only, mouth only) rather than the entire face.
How to blur a face manually in GIMP (free, works on Windows/Mac/Linux):
- Open your photo in GIMP and select the Ellipse Select Tool from the toolbar
- Draw a circle around the face you want to blur — hold Shift while dragging to create a perfect circle
- Go to Filters → Blur → Gaussian Blur and set the radius to 15-25 pixels (higher numbers = stronger blur)
- Click OK, then Select → None to remove the selection outline — the face now appears blurred
- Export as JPG or PNG from File → Export As
Why you need file format guidance: GIMP saves in .xcf by default (editable layers), but you need JPG/PNG for sharing. Always export, don't just save.
Key limitation: You manually draw around every face. A group photo with 10 people means 10 separate selections. This takes 2-3 minutes per face — fine for 1-2 faces, tedious for batch work.
AI-Powered Automatic Detection
blur.me and similar AI tools automatically detect every face in your photo within seconds. The AI scans the image, draws bounding boxes around detected faces, and applies blur instantly. Use this method when you have multiple faces, batch photos (wedding albums, event coverage), or need speed over manual precision.
How to blur faces automatically with blur.me:
- Go to blur.me/studio in any browser (no download required) and drag your photo into the upload zone — accepts JPG/PNG up to 5GB
- AI detects all faces within 3 seconds and highlights them with blue bounding boxes — why auto-detection accuracy matters: blur.me's deep learning model achieves 98%+ detection even in poor lighting or side profiles, vs 70-80% for basic face recognition APIs
- Adjust blur intensity with the slider (0-100) — use-case guidance: set 30-40 for aesthetic soft focus (portrait backgrounds), 80-100 for legal compliance where facial features must be completely unrecognizable under GDPR Article 4(1) anonymization standards
- Click any bounding box to toggle blur ON/OFF for that specific face — useful when you want to blur bystanders but keep the main subject clear
- Download the processed image — output quality details: blur.me preserves original resolution and applies lossless blur (no re-compression artifacts), outputs in the same format as input (JPG→JPG, PNG→PNG with transparency intact)
Why blur intensity affects compliance: A blur radius of 15 pixels might hide identity from casual viewers but fails forensic analysis. GDPR requires "irreversible anonymization" — you need 80+ intensity to destroy original pixel data permanently.
Key advantage: Process 100 photos in 5 minutes vs 200+ minutes of manual selection. The AI tracks faces even when partially obscured (sunglasses, hats, hand gestures).
Browser-Based Pixelation Tools
Redact.photo and iLoveIMG apply pixelation (mosaic effect) instead of gaussian blur. Pixelation divides the face into large square blocks, making it look like a censored TV broadcast. Use this when you want an obvious "this was intentionally hidden" visual style, or when working on a public computer where you can't install software.
How to pixelate faces with Redact.photo (free, no signup):
- Visit redact.photo and click "Upload Image" — works entirely in your browser using WebAssembly (no server upload, your photo never leaves your device)
- Click the Pixelate tool, then click-and-drag a box around the face
- Adjust pixelation block size with the slider — larger blocks = more aggressive anonymization
- Click "Download" to save the edited photo as PNG
Key limitation: Manual box drawing for each face. No automatic detection. Pixelation also creates a harsh, blocky aesthetic — less natural than gaussian blur for social media posts.
Mobile Quick-Edit Apps
FaceBlur (iOS) and ObscuraCam (Android) let you blur faces directly on your phone before posting to Instagram, TikTok, or messaging apps. Use this method when you shot the photo on your phone and want to anonymize it immediately without transferring to a computer.
How to blur faces on iPhone with FaceBlur:
- Download FaceBlur from the App Store (free with ads, $2.99 removes ads)
- Tap "Select Photo" and choose an image from your camera roll
- Tap the Auto Detect button — the app scans for faces and applies blur automatically
- Adjust blur strength by dragging the intensity slider (the app shows a real-time preview as you drag)
- Tap "Save" to export the blurred photo back to your Photos app
Why real-time preview matters: You see exactly how the blur looks before saving. Desktop tools often require a "render preview" step that takes 10-20 seconds per adjustment.
Key limitation: Mobile apps struggle with large batch sizes (20+ photos). Phone processors overheat and the app crashes. Stick to 1-10 photos per session, or use a desktop solution for event albums.
Where to Use the Face Blur Effect?
1. Social Media (Instagram, TikTok, WhatsApp DPs)Want a unique blurred profile pic? Many users prefer their display pics to be hidden in a black or blurred face style for a mysterious or aesthetic look.### 2. YouTube & Faceless Content CreationThinking about starting a faceless YouTube channel? A blur face effect can help maintain privacy while creating engaging videos.### 3. Digital Marketing & MonetizationIf you're into faceless digital marketing, hiding your face in content can be a smart branding choice.### 4. Professional & Legal UseFrom journalists who need to blur faces in video to businesses ensuring compliance, the face blur effect is useful in many industries.
Blur Faces Anytime, Anywhere – 100% Online
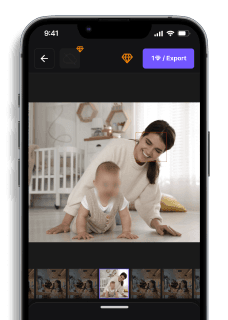
Unlike apps that require downloads, BlurMe is an online blur face editor, making it perfect for quick edits on any device. Whether you're using an iPhone and need to blur faces on iPhone or editing on a laptop, BlurMe’s intuitive tool works seamlessly.
Quick Comparison: Face Blur Tools
| Feature | Blur.me | Snapseed | Photoshop | GIMP | Canva |
|---|---|---|---|---|---|
| Price | Free tier + paid plans | Free | $54.99/month (Photography plan) | Free (open-source) | Free tier, Pro $13/month |
| Face Detection | AI auto-detect (98%+ accuracy) | Manual selection only | Manual selection + Content-Aware | Manual selection | Manual selection |
| Automation Level | Full auto (AI detection + tracking) | Manual (brush tool per face) | Semi-auto (select + filter) | Manual (feather + blur filter) | Manual (drag blur element) |
| Steps Required | Upload → AI detects → Download | 6 steps (select, brush, adjust) | 5 steps (lasso, feather, filter) | 7 steps (layer, mask, blur) | 4 steps (upload, add blur, adjust) |
| Time per 100 Photos | ~5 minutes (batch upload) | ~45 minutes (one by one) | ~30 minutes (actions help) | ~50 minutes (manual workflow) | ~25 minutes (template reuse) |
| Blur Control | Intensity slider (0-100) | Brush strength + feather | Gaussian blur radius + mask | Blur radius + layer opacity | Preset blur levels (low/med/high) |
| Platform | Web (any browser, mobile-friendly) | iOS/Android app only | Windows/macOS desktop | Windows/macOS/Linux desktop | Web + mobile app |
| Best For | Batch processing event photos with multiple faces | Quick mobile edits on the go | Professional photographers needing precise control | Budget users comfortable with advanced tools | Social media graphics with simple blur needs |
Verdict: Snapseed wins for free mobile editing but requires manual brushing on every face. Photoshop justifies its $55/month cost with layer-based precision and Content-Aware Fill integration for complex compositions. Blur.me stands out with AI auto-detection that processes 100 photos in ~5 minutes versus 45+ minutes of manual brushing — critical for event photographers handling hundreds of images with GDPR compliance deadlines.
Faces or plates to hide in your photo?
Drop a photo or video in your browser and the AI auto-blurs faces, license plates, and personal info in seconds.
Upload free