How to Pixelate Part of an Image (Fast & Free)
Maya Chen — Tech Writer & Privacy Advocate Part of: Blur Photo Complete Guide: Methods, Tools & Best Practices (2026)Read the complete guide →
How to Pixelate Part of an Image (Fast & Free)
You're editing a photo for social media and need to pixelate part of image to hide a license plate, credit card number, or someone's face — but now you're stuck clicking through menus in Photoshop, manually dragging selection boxes, and applying filters one region at a time. The manual method takes 2 minutes and 5 steps per image, and if you miss a single sensitive detail, you've compromised privacy or violated data protection rules. Worse, most free tools either slap watermarks on your output or force you to download clunky desktop software that crashes mid-edit. There's a faster way: modern photo editors apply mosaic effects in seconds with adjustable pixel sizes, and some AI-powered platforms detect faces automatically — all without leaving your browser.
🛠️ Common Approaches to Pixelate Part Of Image
You can pixelate part of an image using four main methods: browser-based online tools, mobile apps, desktop editing software, or AI-powered platforms. Each approach fits different workflows — quick social media edits, batch processing event photos, or professional design work requiring layer control.
Method 1: Online Photo Editor (Fastest for Single Images)
Canva, Pixlr, and Fotor offer free browser-based pixelation tools that work instantly without downloads. Upload your photo, paint over the area to censor, and export a clean file in under 60 seconds. These online tools handle basic privacy protection tasks like hiding credit card numbers in screenshots or obscuring street signs in travel photos.
How to pixelate using Canva:
- Open Canva's Photo Editor and upload your image (drag-and-drop or click Upload)
- Click Edit Image → Effects → scroll to Pixelate effect
- Use the brush tool to paint over faces, license plates, or sensitive information — the mosaic effect applies in real-time as you drag
- Adjust pixel block size using the Intensity slider (0-100 scale, where 100 creates larger, more visible blocks)
- Download as PNG for transparent backgrounds or JPEG for smaller file sizes
The main limitation: manual selection only. You must trace every face or object individually with the pixelation brush. For group photos with 10+ people, this becomes tedious. Canva also compresses export quality on the free tier — acceptable for Instagram stories, problematic for print materials.
Pixlr works similarly but supports layer masks for non-destructive editing. Photopea (a browser-based Photoshop clone) offers the most control with its Filter → Pixelate → Mosaic menu, letting you define exact pixel dimensions (8x8, 16x16, 32x32 blocks).
Method 2: Mobile App (Best for On-the-Go Editing)
Blur Photo Editor (iOS/Android), PicsArt, and Snapseed provide mobile-friendly pixelation for quick photo censoring before posting to social media. Perfect when you need to redact a photo directly from your phone's camera roll.
How to pixelate on Snapseed (Google's free photo editor):
- Open Snapseed → tap the + icon → select your photo
- Tap Tools → Lens Blur (this creates background blur, not pixelation — for true mosaic effect, use Healing tool's manual selection)
- For actual pixelation: use PicsArt instead → tap Effects → Artistic → Pixelate
- Adjust the Pixel Size slider (small blocks for subtle anonymization, large blocks for complete obscuring)
- Tap Apply → Save to export the censored image
Blur Photo Editor (dedicated app) offers the most straightforward mobile workflow: open the app, select a photo, choose Pixelate mode, finger-paint over areas to censor, and export. The app auto-saves your edits without overwriting the original file.
The key drawback: no batch processing. Pixelating 50 event photos means opening each file individually — a 30-minute task that desktop software completes in under 3 minutes. Mobile apps also struggle with precision on small details (like pixelating a single face in a crowd of 20 people requires zooming and careful finger control).
Method 3: Desktop Editing Software (Most Control)
GIMP (free) and Photoshop (paid) deliver professional-grade pixelation with layer support, batch processing, and exact pixel dimension control. Use desktop software when you need consistent mosaic effects across multiple images or require non-destructive editing (ability to undo pixelation later).
How to pixelate in GIMP (free alternative to Photoshop):
- Download GIMP → open your image (File → Open)
- Use the Free Select Tool (lasso icon) to trace around the area you want to pixelate
- Go to Filters → Blur → Pixelate — a dialog box appears
- Set Pixel Width and Pixel Height (start with 10x10 for subtle effect, 30x30 for strong obscuring)
- Click OK → the selection becomes pixelated while the rest of the image stays sharp
- Export as PNG to preserve quality (File → Export As)
GIMP's advantage: You can save your selection as a layer mask and toggle pixelation on/off without re-editing. This matters when clients ask for the original un-pixelated version later.
Photoshop users should use Filter → Pixelate → Mosaic instead, which offers identical functionality but with Adobe's faster rendering engine. For batch processing 100+ images, Photoshop's Actions feature automates the entire workflow (record the pixelate steps once, then apply to a folder of images with one click).
The trade-off: steep learning curve. Desktop software requires installation, takes 5-10 minutes to learn the interface, and feels overkill for censoring a single Instagram photo. Stick with online tools or mobile apps for quick one-off edits.
Method 4: AI-Powered Selective Blur Tool (Fastest for Batch Processing)
Adobe Express, Paint.NET (with plugins), and AI-based privacy tools automatically detect faces and apply pixelation without manual selection. Upload a photo, the AI draws bounding boxes around every detected face, and you export a censored version in 3 clicks.
How to use Adobe Express for automatic face pixelation:
- Go to Adobe Express Blur Tool → upload your image
- The AI auto-detects faces and displays blue selection boxes
- Toggle individual faces on/off if you want to keep some faces visible
- Adjust Blur Strength (Adobe Express uses Gaussian blur by default — for true pixelation, switch to Mosaic effect in advanced settings)
- Download the edited image (free tier allows 5 exports per month)
blur.me takes this further: drag-and-drop 100 photos, the AI pixelates all detected faces in ~5 minutes, and you download a ZIP file of censored images. No manual painting, no missed faces in group shots.
The limitation: AI misses some faces. Side profiles, partially obscured faces, or faces smaller than 40x40 pixels often go undetected. Always review the output before publishing — especially for GDPR compliance scenarios where missing a single face creates legal risk.
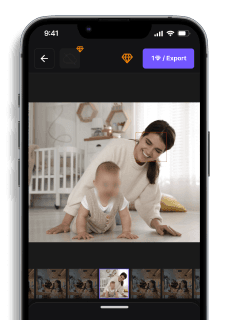
🚀 Pixelate Part of Image with AI (Blur.me)
You have 100 event photos where guests' faces need pixelation before posting to your company's public gallery — manual selection in Canva means 200+ minutes of clicking. Blur.me's face detection engine handles the entire batch in under 5 minutes.
Drop your photos in — the AI scans all 100 images simultaneously and draws blue bounding boxes around every detected face within seconds (98%+ accuracy across angles and lighting).
Adjust pixel block size — drag the intensity slider from 0-100 while previewing the mosaic effect in real-time; click individual faces to toggle exclusions (keep the keynote speaker visible, blur the audience).
Batch export at original quality — all 100 pixelated images download as a ZIP file with zero resolution loss, ready for immediate publication.
The 5-minute batch processing window works for event photos, but when faces appear in video clips — where a single 30-second TikTok can contain 900 frames — blur.me's motion tracking eliminates the need to pixelate every frame manually. Upload once, and the AI follows each face across all frames automatically.
Faces or plates to hide in your photo?
Upload and the AI blurs them automatically in seconds.
🔍 Quick Comparison: Pixelate Part of Image Tools
| Feature | Blur.me | Photoshop | GIMP | Canva | Snapseed |
|---|---|---|---|---|---|
| Price | $0 (free tier) | $54.99/mo | $0 (open-source) | $0 (free tier) | $0 (free) |
| Face Detection | AI auto-detect | Manual selection only | Manual selection only | Manual brush tool | Manual brush tool |
| Automation Level | Full auto (AI detection) | Manual (Lasso Tool + Filter) | Manual (Selection + Pixelate filter) | Manual (Effects brush) | Manual (Selective tool) |
| Steps Required | Upload → AI detects → Export | 5 steps (Select → Filter → Mosaic → Adjust → Save) | 4 steps (Selection → Filters → Pixelate → Export) | 3 steps (Upload → Brush → Download) | 4 steps (Open → Selective → Pixelate → Save) |
| Time per Photo | ~3 seconds | ~2 minutes | ~90 seconds | ~45 seconds | ~60 seconds |
| Pixel Size Control | Fixed optimal size | 1-999 pixel blocks | 1-300 pixel blocks | Low/Medium/High presets | Intensity slider 0-100 |
| Platform | Web browser | Windows/Mac desktop | Windows/Mac/Linux | Web browser | iOS/Android mobile |
| Batch Processing | Yes (100+ photos) | Yes (Actions panel) | Yes (batch mode) | No (one at a time) | No (mobile only) |
| Export Format | JPG/PNG/WebP | JPG/PNG/TIFF/PSD | JPG/PNG/TIFF/XCF | JPG/PNG (compressed) | JPG only |
| Best For | Privacy-focused users needing fast face redaction across multiple photos | Professional designers requiring precise control over pixel block size and layer-based editing | Budget-conscious users comfortable with desktop software who need full manual control | Social media creators doing quick one-off edits without software installation | Mobile photographers editing on-the-go with smartphone-only workflow |
Verdict: GIMP delivers the best free desktop option with full manual control over pixelation intensity and batch processing, but requires 4 steps and ~90 seconds per photo. Photoshop justifies its $54.99/month cost with layer masks, Actions automation for batch jobs, and precise 1-999 pixel block sizing — essential for print-quality work. Blur.me eliminates manual selection entirely through AI face detection, processing 100 event photos in ~5 minutes versus 3+ hours of manual brush work in Canva or Snapseed.
FAQ
How do I pixelate a section of an image?
Upload your photo to an online editor like Canva or Fotor, select the rectangular selection tool, drag over the area to hide (face, license plate, credit card), then apply the mosaic effect filter. Adjust pixel block size using the intensity slider — larger blocks (20-30px) obscure details completely, smaller blocks (5-10px) create subtle censoring. Desktop software like Photoshop offers layer masks for non-destructive editing: create a duplicate layer, apply Filter → Pixelate → Mosaic, then erase unwanted pixelation areas. For batch processing 50+ photos, blur.me auto-detects faces and applies pixelation in ~3 seconds per image versus 2 minutes manual selection in traditional editors.
Can I blur a specific part of a photo?
Yes — blur and pixelation are different effects that serve the same privacy purpose. Blur creates a soft Gaussian defocus (similar to camera bokeh), while pixelation replaces image regions with colored blocks. Most photo editors including GIMP, Photopea, and Adobe Express support both: select your region, then choose Blur Tool or Pixelate/Mosaic filter. Blur looks more natural for background anonymization in portrait photos, pixelation works better for GDPR-compliant face redaction because it's irreversible. Photoshop's Smart Blur preserves edges while blurring interiors — ideal for hiding text on documents while keeping layout readable.
How to pixelate a section of an image on iPhone?
Open Photos app → tap Edit → three dots (•••) → Markup, then use the pen tool to draw solid blocks over sensitive areas (this hides but doesn't truly pixelate). For actual mosaic effects, download Blur Photo Editor or PicsArt from App Store: both apps offer adjustable pixel size sliders and shape-based selection (circle, rectangle, freehand). Snapseed provides Selective blur with finger-painting controls — pinch to adjust blur radius, swipe to change intensity. iPhone's native tools lack batch processing: pixelating 20 event photos requires opening each file individually (10-15 minutes total) versus automated face detection in video blur tools that process entire galleries in under 2 minutes.
How do I blur part of a photo on Pixel?
Google Photos app (pre-installed on Pixel phones) includes a built-in blur tool: open your image → tap Edit → Tools → Blur, then paint over faces, license plates, or background elements with your finger. Adjust blur intensity using the slider at bottom — 50% creates light defocus, 100% produces strong pixelation-like effect. For mosaic pixelation specifically, install Paint.NET or Pixlr mobile app: both support rectangular selection + Pixelate filter with adjustable block size (5-50px range). Pixel's Magic Eraser removes objects entirely rather than blurring them — useful for removing people from photos but not HIPAA-compliant redaction where original content must remain obscured, not deleted.
Is pixelation secure enough for privacy protection?
Standard pixelation is irreversible and GDPR-compliant when pixel blocks exceed 16×16px — smaller blocks risk AI-powered depixelation attacks that reconstruct faces from low-resolution mosaics. HIPAA Safe Harbor method requires pixelation that makes individuals "not identifiable" to skilled professionals: use 20-30px blocks for faces, 40-50px for license plates and credit cards. Blur effects are less secure: Gaussian blur can be partially reversed using deconvolution algorithms, especially in high-contrast images. For legal compliance, combine pixelation with metadata stripping (EXIF removal) — Photoshop's Export As → Remove Location Info, or online tools like Scrambled Exif that delete GPS coordinates and camera serial numbers embedded in JPEG files.
Manual pixelation works for occasional edits — but if you're processing event photos weekly or handling compliance workflows, spending 2 minutes per image adds up fast. For teams managing hundreds of photos, batch blur tools cut that time by 75%. The decision comes down to volume: one-off social media posts justify free editors like Canva, while recurring privacy work (real estate listings, HR documents, medical imaging) demands automation that pays for itself after 50 images.
Faces or plates to hide in your photo?
Drop a photo or video in your browser and the AI auto-blurs faces, license plates, and personal info in seconds.
Upload free