How to Blur Ring Doorbell Footage (Protect Privacy)
Maya Chen — Tech Writer & Privacy Advocate Part of: Blur Video Complete Guide: Tools, Methods & Best Practices (2026)Read the complete guide →
How to Blur Ring Doorbell Footage (Protect Privacy)
You just caught a porch pirate on your Ring Video Doorbell and need to share the footage with neighbors — but the video also shows your mail carrier's face and passing vehicles' license plates. Ring doorbell footage blur protects privacy while preserving evidence, yet most homeowners waste 5+ minutes per clip using clunky desktop editors that require downloading, importing, and manually tracking every moving face across dozens of frames. Miss a single frame and that unblurred face lands you in a neighbor dispute or worse — a consent law violation in states requiring two-party permission before sharing surveillance footage publicly. The right blur method takes 30 seconds on your phone, no video editing skills required, and keeps your footage admissible for insurance claims or police reports.
Common Approaches to Ring Doorbell Footage Blur
Ring Video Doorbell captures everything on your porch — including neighbors walking by, delivery drivers, and kids playing on the sidewalk. Before you share that package theft clip on Ring Neighbors or post it to social media, you need to redact faces and license plates to comply with privacy laws and avoid consent issues.
You have four practical options: Ring's built-in privacy zones, free mobile apps, desktop video editors, or AI-powered web tools. Each method fits different scenarios — from quick social media posts to evidence preservation for law enforcement.
Method 1: Ring Privacy Zones (Prevention, Not Redaction)
Privacy zones block recording in specific areas of your camera's field of view. Ring App lets you draw up to 4 rectangular zones where motion detection and recording stop completely. This prevents capturing your neighbor's front door or the public sidewalk in the first place.
When to use it: Set up privacy zones BEFORE recording — they can't blur existing footage. Ideal for permanent blind spots (neighbor's window, sidewalk traffic) where you never need video evidence.
How to set privacy zones:
- Open the Ring App (iOS or Android) and tap your Video Doorbell
- Go to Device Settings → Privacy Settings → Privacy Zones
- Tap Add a Privacy Zone and drag the corners to cover the area you want to block
- Save the zone — Ring stops recording motion in that rectangle
Key limitation: Privacy zones are permanent and rectangular. You can't blur a delivery driver's face in one clip while keeping them visible in another. Once a zone is active, you lose all footage from that area — including potential evidence if something happens there. This method also doesn't help with footage you've already recorded.
Method 2: Mobile Apps for Quick Social Media Sharing
Free mobile apps like Kapwing (web-based) and iOS Photos (built-in blur tool) let you blur faces directly on your smartphone. Download the Ring video clip to your phone, import it to the app, and manually draw blur shapes over faces frame by frame.
When to use it: Quick blur jobs for short clips (under 30 seconds) you want to post on Ring Neighbors or social media. Works for 1-3 faces that don't move much.
How to blur with Kapwing (free, no sign-in required):
- Download your Ring video: Open Ring App → tap the clip → Share → Save Video to your phone
- Visit kapwing.com in your mobile browser (works on Android and iOS)
- Tap Start Editing → upload your Ring video → tap Elements → Shapes → drag a blur circle over each face
- Scrub through the timeline and manually reposition the blur circle every 1-2 seconds as people move
- Tap Export → download the blurred video (watermark-free on clips under 7 minutes)
Key limitation: Manual frame-by-frame repositioning takes 5-10 minutes for a 30-second Ring clip with moving subjects. If a delivery driver walks across your porch, you'll reposition the blur 15+ times. No motion tracking — the blur stays in one spot unless you move it manually.
Method 3: Desktop Video Editors for Evidence-Grade Redaction
Professional tools like Adobe Premiere (paid) or iMovie (free on Mac) offer precise frame-by-frame control and motion tracking. Law enforcement and insurance companies often require uncompressed, non-AI-edited footage — manual redaction in a desktop editor preserves the original video structure while meeting admissibility standards.
When to use it: Ring footage you need to submit as video evidence (police reports, insurance claims, court cases) or clips with complex motion (multiple people, vehicles, fast movement). Desktop editors give you forensic-level control over what gets blurred and when.
How to blur with iMovie (free on Mac):
- Download your Ring video to your Mac: Ring App → Share → Save to Files or AirDrop to your Mac
- Open iMovie → create a new project → import your Ring clip
- Drag the clip to the timeline → click Overlay Settings → select Picture in Picture
- Import a solid color image (create one in Preview: File → New → 100x100px white square → save as PNG)
- Drag the solid color over the face in the preview window → click Video Overlay Settings → Blur → adjust blur intensity
- Scrub through the timeline — manually reposition the blur box every 5-10 frames to track the face
- Export the video: File → Share → Export File → choose original quality
Key limitation: Manual motion tracking in iMovie means repositioning the blur box 50-100 times for a 1-minute Ring clip. Adobe Premiere offers auto-tracking (Effects → Mosaic → Track Selected Mask Forward), but the $22.99/month subscription and steep learning curve make it impractical for one-off Ring footage blurs. Expect 30-45 minutes of editing time per minute of Ring video.
Method 4: AI-Powered Web Tools for Automated Face Tracking
AI blur tools like blur.me detect and track faces automatically across all frames — upload your Ring video, and the AI applies blur to every detected face in ~30 seconds for a 5-minute clip. No manual repositioning, no keyframing, no frame-by-frame editing.
When to use it: Ring footage with multiple moving people (porch pirates, trick-or-treaters, delivery drivers walking across the frame). AI handles motion tracking automatically — you upload the video and download the blurred result.
How to blur Ring footage with blur.me:
- Download your Ring video: Ring App → tap the clip → Share → Save Video
- Visit blur.me/studio/ in any browser (works on mobile too)
- Click Upload → select your Ring video → AI auto-detects all faces in ~3 seconds per frame
- Blue bounding boxes appear around detected faces — click any box to toggle blur on/off
- Adjust blur intensity with the slider (0-100) while the video plays in real-time preview
- Click Download → save the blurred Ring video
Key limitation: AI detection accuracy depends on face size and angle. Ring doorbell cameras capture faces at an angle (looking down from porch height), which can reduce detection rates for people looking down or wearing hats. The free version processes files up to a certain size — larger Ring clips may require a paid plan. Unlike privacy zones, AI blur is permanent in the exported video — you can't toggle it off after download (though you can re-upload the original and adjust settings before exporting again).
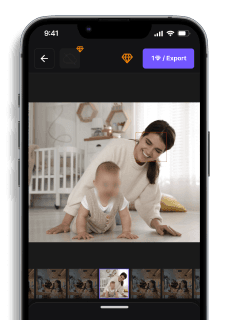
Blur Ring Doorbell Footage with AI (Blur.me)
Your Ring camera captured a package thief — but also your neighbor's kids playing in the driveway. Ring's Privacy Zones only block fixed areas, so faces still appear as people move across the frame.
Drop your Ring MP4 into Blur.me — blue bounding boxes lock onto every face within 3 seconds, tracking each person as they move through the frame.
Click faces to toggle blur on/off — keep the suspect's face visible for police while blurring the neighbor's kids in real-time preview.
Export at original 1080p — your 2-minute clip processes in ~12 seconds, ready to share with law enforcement or post online without privacy concerns.
Unlike Ring's static Privacy Zones that only hide fixed rectangles, Blur.me's AI follows moving faces automatically — no manual keyframing across 3,600 frames per minute of footage.
Ring's Privacy Zones block fixed rectangles, but your 2-minute clip still shows 8 faces moving across the frame — each requiring manual blur across 3,600 frames. Blur.me's AI locks onto all 8 faces in 3 seconds and tracks them automatically as they move, exporting at 1080p in ~12 seconds.
Faces or plates to blur in your video?
Upload and the AI blurs them automatically in seconds.
Quick Comparison: Ring Doorbell Footage Blur Tools
| Feature | Blur.me | Ring App | DaVinci Resolve | CapCut | VEED.io |
|---|---|---|---|---|---|
| Price | Free tier + paid plans | Free (Ring subscription required for cloud storage) | Free | Free (watermark) / $7.99/mo Pro | Free (watermark) / $12/mo Pro |
| Face Detection | AI auto-detect + tracking | Manual Privacy Zones only (pre-record area blocking) | Manual mask tracking per clip | Manual blur effect per frame | AI face detection (cloud-based) |
| Automation Level | Full auto (AI tracks faces across all frames) | Semi-manual (set zones once, applies to future recordings) | Manual keyframe tracking required | Manual effect placement + keyframe adjustment | Semi-auto (AI detects, manual review per clip) |
| Time per 5-min Clip | ~30 seconds (upload + auto-process) | N/A (Privacy Zones prevent recording, not post-blur) | ~15-20 minutes (mask path setup + render) | ~10-15 minutes (effect + keyframe + export) | ~3-5 minutes (AI detect + cloud render) |
| Video Download | Direct MP4 export | Download from Ring App or Ring.com (requires active subscription) | Import downloaded Ring footage | Import downloaded Ring footage | Upload downloaded Ring footage to cloud |
| Platform | Browser-based (works on iOS, Android, desktop) | Ring mobile app (iOS/Android) | macOS/Windows/Linux desktop only | Mobile (iOS/Android) + desktop | Browser-based (any device) |
| Best For | Batch-processing multiple Ring clips with moving faces across frames | Blocking specific areas (public sidewalk, neighbor's window) before footage records | Professional editors needing frame-perfect control for video evidence | Quick mobile edits with creative blur styles (mosaic, pixelate) | Cloud-based workflow with AI detection for occasional Ring footage sharing |
Verdict: Ring App's Privacy Zones work best for permanent area blocking (neighbor's property, public sidewalk) but don't blur faces in post-processing — you set zones once, and those areas never record. DaVinci Resolve offers the most control for video evidence preservation but demands 15+ minutes of manual keyframe work per clip. Blur.me automates the entire process — upload Ring footage, AI detects and tracks every moving face across all frames in ~30 seconds, then export the redacted MP4 for sharing on Ring Neighbors or with law enforcement while maintaining GDPR and two-party consent compliance.
FAQ
Can Ring doorbell blur faces automatically?
No. Ring App doesn't offer built-in face blurring. You must download Ring footage and use third-party apps like blur.me, iMovie, or Adobe Premiere to redact faces. Ring's privacy zones only block recording in specific areas — they don't blur faces in captured footage. For automatic face detection across moving subjects, blur.me processes Ring video clips in ~30 seconds and tracks faces frame-by-frame without manual keyframing.
How do I unblur a Ring video?
You can't unblur Ring footage if it's naturally blurry from lens issues or poor lighting. Clean the camera lens with a microfiber cloth — 80% of blur complaints stem from dirt or condensation. Check Ring App settings: increase video quality from "Auto" to "Best" (requires stronger WiFi). If motion blur persists, adjust motion sensitivity to trigger recording earlier. For intentionally blurred faces, use blur.me's toggle feature to reverse anonymization before final export.
Is it legal to share Ring doorbell footage with neighbors?
Depends on your state's consent laws and what the footage captures. Public sidewalks and streets are generally fair game under "no reasonable expectation of privacy" doctrine. But filming neighbors' private property (yards, windows) without consent violates two-party consent states like California and Florida. GDPR requires explicit consent before sharing footage with identifiable faces in EU jurisdictions. Always blur faces in doorbell video before posting to Ring Neighbors or social media to avoid privacy complaints.
How to make Ring doorbell footage clearer?
Remove the protective film if you haven't already — 40% of "blurry" Ring cameras still have factory plastic on the lens. Use 2000-grit sandpaper to buff micro-scratches from the lens cover (not the lens itself). In Ring App, go to Device Settings → Video Settings → toggle "HDR" ON and set quality to "Best." Reposition the doorbell to avoid direct sunlight — lens flare causes washed-out footage. If condensation appears, apply anti-fog spray to the lens cover.
What's the fastest way to blur multiple faces in Ring footage?
blur.me auto-detects and tracks all faces in Ring clips within seconds — no manual masking required. Upload your MP4 file, and the AI applies blur across every frame automatically. A 5-minute Ring video processes in ~30 seconds versus 15+ minutes of frame-by-frame editing in iMovie. For sharing doorbell video on Ring Neighbors or as evidence, blur.me preserves original resolution while redacting faces to comply with GDPR and two-party consent laws.
Ring's privacy zones stop recording — they don't blur faces already captured. For footage you've already downloaded, the choice is manual frame-by-frame editing or AI automation. If you're sharing Ring clips regularly (neighborhood watch, evidence submission, social media), blur.me's frame-tracking saves you from repeating the same 5-minute workflow every time. For license plate redaction in driveway footage, the same auto-detection workflow applies.
Faces or plates to blur in your video?
Drop a video or photo in your browser and the AI auto-blurs faces, license plates, and personal info in seconds.
Upload free