Blur PNG Images - Easy, Fast and Online
Maya Chen — Tech Writer & Privacy Advocate Part of: Blur Photo Complete Guide: Methods, Tools & Best Practices (2026)Read the complete guide →
Blur PNG images online in seconds with BlurMe, with no complicated software downloads needed. Whether you want to hide personal details, blur faces, or create a soft background effect, BlurMe’s AI-powered tool makes it simple to protect privacy or add style to your images. Upload your PNG, JPG, or JPEG file, choose the area you want to blur, and watch the AI do the work for you, all directly in your browser.Here’s how to blur PNG files online quickly and effortlessly using BlurMe’s smart blur editor.
Shared a screenshot with your email visible? Posted a photo with a stranger's face? You need to blur PNG images—but most photo editors force you through 5 steps and 3 minutes of manual masking per file. Worse, if the PNG has a transparent background, traditional blur tools often destroy the alpha channel, leaving you with an ugly white box around your image. Online tools promise quick fixes but deliver pixelated messes or force you to download bloated software. There's a faster way: automated AI detection that preserves PNG transparency while blurring faces, text, or any region you select in under 30 seconds.
Common Approaches to Blur PNG
You can blur a PNG image using browser-based tools, desktop photo editors, or AI-powered platforms. Each method handles alpha channel transparency differently — some preserve it perfectly, others flatten your image to white or black. Pick the right approach based on whether your PNG has a transparent background and how much control you need over blur intensity.
Method 1: Online PNG Blur Tools (Fastest for Simple Jobs)
Online PNG blur tools process your image directly in the browser without installing software. They work best for quick edits when you need to blur an entire PNG or a rectangular region. Most free tools preserve PNG transparency automatically.
How to blur a PNG online with Photopea:
- Open Photopea at photopea.com (free, no signup required)
- Upload your PNG — drag the file into the browser window
- Select the blur area — use the Rectangle Select tool (M key) to highlight the region you want to blur, or skip this step to blur the entire image
- Apply Gaussian blur — go to Filter → Blur → Gaussian Blur, set radius between 5-20 pixels (higher = stronger blur), click OK
- Export as PNG — File → Export As → PNG, check "Save transparency" to preserve the alpha channel
Photopea handles PNG files with transparency better than most online editors because it runs a full Photoshop-like engine in your browser. The blur effect applies only to visible pixels — transparent areas stay transparent.
Limitation: Free online tools often cap file size at 10-25 MB. If you're working with high-resolution PNGs (4K+ images from design projects), you'll hit upload limits. Processing also slows down with large files because everything runs client-side in JavaScript.
Method 2: Desktop Software (Best for Precision Control)
GIMP and Photoshop give you pixel-level control over blur radius, feathering, and selective blur zones. Use desktop software when you need to blur specific objects (faces, logos, text) while keeping the rest sharp, or when batch-processing dozens of PNG images.
How to blur a PNG in GIMP (free desktop app):
- Install GIMP from gimp.org (Windows, Mac, Linux — 100% free)
- Open your PNG image — File → Open, select your file
- Create a selection mask — use the Free Select tool (F key) to draw around the area you want to blur, or use Select → All to blur the entire image
- Apply blur filter — Filters → Blur → Gaussian Blur, adjust X/Y radius (start at 10-15 pixels), preview in real-time, click OK
- Export with transparency — File → Export As, choose PNG, check "Save background color" is OFF to preserve transparency
GIMP supports alpha channel editing, so you can blur semi-transparent regions without destroying the original transparency gradient. The motion blur and pixelate filters also work on PNG files with transparent backgrounds.
Limitation: Desktop software requires installation and a learning curve. GIMP's UI feels clunky compared to modern web apps — expect 10-15 minutes to learn the selection tools if you've never used it before.
Method 3: Canva (Best for Non-Technical Users)
Canva simplifies PNG blurring with a drag-and-drop interface. Upload your image, apply the blur tool, and download — no layer management or filter menus. Canva works best when you need to blur an entire PNG image or add a background blur effect for social media graphics.
How to blur a PNG in Canva:
- Sign up for Canva at canva.com (free tier includes blur tools)
- Create a blank design — click "Custom size", enter your PNG dimensions (or use "Instagram Post" for 1080x1080)
- Upload your PNG — click "Uploads" tab, drag your file, then place it on the canvas
- Apply blur — click the image, select "Edit image" → Effects → Blur, drag the slider to adjust blur intensity (0-100 scale)
- Download as PNG — click "Share" → Download, choose PNG format, check "Transparent background" if your original had transparency
Canva auto-detects transparent backgrounds and preserves them during export. The blur slider gives you instant visual feedback — no guessing pixel radius values like in GIMP.
Limitation: Canva's blur applies to the entire image uniformly. You can't blur just a face or license plate without upgrading to Canva Pro ($120/year) for the Background Remover + selective editing combo. Free users get all-or-nothing blur.
Method 4: AI-Powered Blur Tools (Best for Batch Processing)
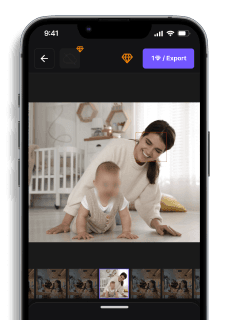
AI blur tools like blur.me detect and blur specific objects (faces, license plates, logos) automatically. Upload a PNG with 10 faces, and AI detects every one in ~3 seconds. This method saves hours when you need privacy protection for event photos, ID documents, or product screenshots with visible customer data.
How to blur a PNG with blur.me:
- Open blur.me/studio in any browser (works on mobile too — no installation needed)
- Upload your PNG — drag the file or click "Upload Image" (supports up to 5GB files)
- Auto-detect objects — AI scans for faces, license plates, and text, then highlights them with blue bounding boxes
- Adjust blur settings — drag the intensity slider (0-100) to control blur effect strength, click any detected box to toggle it off
- Download PNG — click "Export", choose PNG format to preserve image transparency
blur.me processes 100 photos in ~5 minutes total. The AI tracks objects even if they're partially hidden behind other elements, and you can switch between Gaussian blur, pixelate, or solid color fill. The blur tool works on both transparent and solid-background PNGs without flattening layers.
Limitation: Free tier caps at 5 images per session. If you're blurring 50+ PNGs for a client project, you'll need a paid plan. AI occasionally misses objects in low-contrast images (white text on light gray backgrounds).
Faces or plates to hide in your photo?
Upload and the AI blurs them automatically in seconds.
Benefits of Using BlurMe
Fast and Easy: No need for complex software, blur photos in seconds. You can use in any browser, even mobile browsers, Blur Face in iPhone to learn how to blur a picture on iPhone.AI-Powered Precision: Automatically detect faces or objects for precise blurring to blur PNG images. High-Quality Output: Keep your image sharp and clear, with just the blurred areas you choose. great for anonymizing content.
BlurMe's AI automatically detects faces and objects in PNG images while preserving transparency—no manual selection needed. Upload a screenshot with sensitive data, and the AI blurs it in seconds while keeping your transparent background intact.
Faces or plates to hide in your photo?
Drop a photo or video in your browser and the AI auto-blurs faces, license plates, and personal info in seconds.
Upload free