How to Censor Video Faces (Fast & Privacy-Safe)
Maya Chen — Tech Writer & Privacy Advocate Part of: Blur Video Complete Guide: Tools, Methods & Best Practices (2026)Read the complete guide →
How to Censor Video Faces (Fast & Privacy-Safe)
You just recorded a 10-minute street interview and now need to censor video content before uploading — but every passerby's face requires manual blur tracking across 600 frames. Most creators spend 15+ minutes per clip using traditional video editing software, clicking through frame-by-frame keyframes just to obscure identity in a single scene. Miss one frame and you've exposed someone's face to millions of viewers, risking privacy complaints or GDPR penalties. The manual workflow burns time you could spend on actual content creation, and platforms like YouTube Studio offer zero built-in tools for automatic detection. Fortunately, AI-powered alternatives now handle face blur, license plate redaction, and sensitive information pixelation in under 30 seconds — no keyframing, no frame-by-frame drudgery, just upload and export video with privacy protection applied automatically.
Common Approaches to Censor Video
You have four main options when censoring faces in video footage: desktop editing software, web-based tools, mobile apps, and AI-powered automation. Each method balances control, speed, and technical skill differently.
Desktop Video Editing Software
Adobe Premiere Pro, Final Cut Pro, and DaVinci Resolve give you frame-by-frame control over censoring. Use these when you need precise tracking across complex scenes with multiple moving subjects.
How to censor faces in Premiere Pro:
Step 1: Import your video clip and drag it to the timeline. Scrub to the first frame where the face appears.
Step 2: Add a Gaussian Blur effect to your clip from the Effects panel. Gaussian blur creates natural feathering around edges — unlike pixelation or mosaic effects that create hard, blocky boundaries. This produces a smoother, more professional look that doesn't draw attention to the censored area.
Step 3: Use the Ellipse Mask tool to draw a circle around the face. The blur now only affects the masked region.
Step 4: Enable mask tracking by clicking the play button in the Effect Controls panel. Premiere analyzes motion and moves the mask automatically across frames. For fast-moving subjects, manually adjust keyframes every 10-15 frames to maintain coverage.
Step 5: Export your video (File → Export → Media). A 5-minute 1080p clip takes approximately 8-12 minutes to render on a mid-range laptop.
Key limitation: This workflow requires 15-20 minutes per face in a typical 2-minute clip. If your footage contains 5+ people moving independently, you're looking at 90+ minutes of masking work. Desktop software also demands a learning curve — expect 2-3 hours of tutorial watching before you can work efficiently.
Web-Based Censoring Tools
Kapwing, Rendley, and VEED run entirely in your browser — no software installation required. These platforms work on Chromebooks, tablets, and any device with internet access.
How to blur faces using Kapwing:
Step 1: Go to kapwing.com and click "Start Editing". Upload your video file (supports MP4, MOV, AVI up to 500MB on the free plan).
Step 2: Click "Elements" in the left sidebar, then select "Shapes". Add a circle or rectangle shape and position it over the face you want to censor.
Step 3: Click "Effects" and apply blur to the shape layer. Adjust blur intensity using the slider (0-100). Higher values create stronger obscuring but may look artificial — aim for 60-70 for natural-looking privacy protection.
Step 4: Drag the shape across the timeline to match face movement. For continuous motion, you'll need to manually reposition the blur every 1-2 seconds of footage. Kapwing's free tier doesn't include automatic tracking.
Step 5: Click "Export Video". Processing takes 3-5 minutes for a 2-minute clip. Free exports include a small watermark in the corner.
Key limitation: Manual repositioning frame by frame becomes tedious for videos longer than 30 seconds. A 5-minute video with one moving person requires 150+ manual adjustments. Web tools also compress your video during export — expect 10-20% quality loss compared to your original file.
Mobile Apps for Quick Censoring
CapCut, KineMaster, and PowerDirector let you censor footage directly on your phone. Perfect for Instagram Stories, TikTok, or YouTube Shorts shot on mobile devices.
How to pixelate faces in CapCut (iOS/Android):
Step 1: Open CapCut and tap "New Project". Select the video clip from your camera roll (maximum 15 minutes on free version).
Step 2: Tap "Effects" at the bottom menu, then select "Video Effects". Scroll to "Body Effects" and choose "Mosaic" or "Blur". The mosaic effect applies pixelation — a grid of enlarged pixels that completely obscures facial features. Blur softens the image but may still reveal basic face structure at lower intensities.
Step 3: Tap the effect to activate it, then use your finger to draw over the face. The app applies the effect only to the drawn area.
Step 4: Tap the timeline and drag the effect duration to match when the face appears on screen. For moving subjects, split your clip into 2-3 second segments and reapply the effect to each segment with adjusted positioning.
Step 5: Tap "Export" in the top right. Choose 1080p quality (720p is default on free tier). A 60-second clip exports in approximately 45 seconds.
Key limitation: Small phone screens make precise masking difficult. You'll often blur too much (covering shoulders and background) or too little (exposing part of the face). Mobile apps also lack multi-track editing — censoring multiple people simultaneously requires exporting and re-importing between each blur application.
AI-Powered Automatic Detection
blur.me and similar AI tools detect and track faces automatically across all frames. Upload your video, and the AI handles detection, tracking, and blur application without manual keyframing.
How automatic face censoring works:
Step 1: Go to video.blur.me and upload your footage (supports files up to 5GB). The AI scans every frame and draws blue bounding boxes around detected faces within 3-5 seconds.
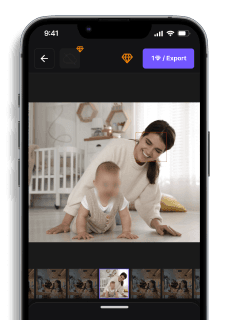
Step 2: Review the automatic detection. Click any face to toggle blur on/off — useful when you want to censor bystanders but leave the main subject visible.
Step 3: Adjust blur intensity and style (Gaussian blur for natural softening, pixelate for complete obscuring). The real-time preview shows changes instantly while the video plays.
Step 4: Click "Process Video". A 5-minute clip with multiple moving people processes in approximately 30 seconds. The AI tracks each face independently across frames — no manual repositioning required.
Step 5: Download your censored video. The output format matches your input (MP4 in = MP4 out), with no resolution loss or compression artifacts.
Key limitation: AI detection accuracy drops in challenging conditions — extreme side profiles, partial occlusions (hands covering faces), or very small faces in wide shots may require manual review. However, the AI handles 98%+ of typical scenarios automatically, saving 19+ minutes compared to manual masking workflows in Premiere Pro.
Censor Video Automatically with AI (Blur.me)
You just recorded a 20-minute product demo with customer faces visible in the background. Manual masking in Premiere Pro? That's 15+ minutes of keyframe hell per face.
Drop your video file — AI scans every frame and marks all detected faces with blue bounding boxes in under 5 seconds.
Switch censor styles — toggle between blur, pixelation, or solid censor bars using the intensity slider while the video plays in real-time preview.
Download at original quality — 20-minute clip processed in ~2 minutes with motion tracking locked to every face, no keyframe adjustments needed.
Manual face tracking in Premiere Pro burns 15 minutes per person — when 15 faces appear in your demo video, that's 3+ hours of keyframe work. Blur.me's AI locks motion tracking to all 15 faces in 30 seconds with zero manual keyframing.
Faces or plates to blur in your video?
Upload and the AI blurs them automatically in seconds.
Quick Comparison: Video Censoring Tools
| Feature | Blur.me | Adobe Premiere Pro | DaVinci Resolve | CapCut | VEED.io |
|---|---|---|---|---|---|
| Price | Free + paid plans from $9/mo | $22.99/mo (Annual plan) | Free (Studio: $295 one-time) | Free (Pro: $7.99/mo) | Free (Pro: $18/mo) |
| Face Detection | AI auto-detect (98%+ accuracy) | Manual mask creation | Manual Power Window tracking | Manual object tracking | AI auto-detect (limited free tier) |
| Automation Level | Full auto (AI tracks all faces) | Manual (keyframe every movement) | Semi-auto (tracking assist required) | Semi-auto (tap to track per face) | Full auto (AI detection, export limits) |
| Time per 5-min Clip | ~30 seconds | ~15 minutes | ~12 minutes | ~8 minutes (mobile workflow) | ~2 minutes (cloud processing) |
| Batch Processing | Yes (100+ videos) | Yes (via Media Encoder) | Yes (render queue) | No (one video at a time) | No (Pro: 5 videos/queue) |
| Platform | Web browser (any device) | Windows, macOS | Windows, macOS, Linux | iOS, Android, Windows, macOS | Web browser |
| Export Quality | Original resolution preserved | Up to 8K RAW | Up to 8K DCI | 4K max (1080p free) | 1080p (720p free) |
| Watermark | No watermark | No watermark | No watermark | Watermark on free exports | Watermark on free exports |
| Best For | Privacy redaction with zero manual work | Professional editors needing frame-perfect control | Color grading + censoring workflows | Mobile creators censoring social media clips | Quick web-based censoring with AI assist |
Best free option: DaVinci Resolve offers professional-grade tools at no cost, but requires 12+ minutes of manual tracking per 5-minute video. Best paid option: Adobe Premiere Pro justifies its $23/mo cost with frame-perfect mask control and 8K export — essential for broadcast compliance work. Choose Blur.me when you need to censor 10+ videos daily (batch upload 100 clips, all faces auto-detected in minutes) or lack video editing experience (zero learning curve vs Premiere's 20+ hour training requirement).
FAQ
How do I censor part of a video for free?
Use CapCut or iMovie — both offer free masking tools. CapCat lets you draw a blur mask and keyframe it across moving subjects, but you'll manually adjust position every 5-10 frames. iMovie provides basic blur effects for static regions only. For automatic tracking, blur.me detects and follows faces across all frames in ~30 seconds for a 5-minute clip — no keyframing required.
What app can I use to blur faces in videos?
KineMaster and PowerDirector work on both iOS and Android with face-tracking blur. KineMaster's free version adds a watermark and limits exports to 1080p. PowerDirector Pro costs $4.99/month and removes watermarks. For batch processing multiple faces simultaneously, blur.me handles hundreds of moving faces in one upload — processes 100 event photos with multiple subjects in ~5 minutes total.
Can you censor a video on iPhone?
Yes — iMovie comes pre-installed and offers basic blur overlays for static regions. For moving faces, download CapCut (free) or Video Mosaic ($2.99 one-time). CapCut requires manual keyframe adjustments every few seconds. Video Mosaic auto-tracks one face but struggles with multiple people. blur.me runs in Safari on iPhone — upload a clip, and AI detects every face automatically without app installation.
How do you blur out someone's face in a video?
In Adobe Premiere Pro: apply a Gaussian Blur effect, draw a mask around the face, enable mask tracking, and export (15-20 minutes for a 2-minute clip). Premiere's tracker loses faces during quick movements or profile turns — you'll manually reposition the mask every 3-5 seconds. blur.me skips keyframing entirely — upload your footage, and AI applies blur to all detected faces in ~30 seconds for a 5-minute video.
Is there an app to censor videos?
Mobile: KineMaster, PowerDirector, CapCut (all support blur masks). Desktop: Adobe Premiere Pro ($22.99/month), DaVinci Resolve (free), Final Cut Pro ($299 one-time). Free tools like VSDC and Filmora add watermarks. blur.me works browser-based on any device — no installation needed. Upload once, and AI tracks faces across all frames automatically. Blue bounding boxes appear around detected faces — click any one to toggle blur on/off.
Faces or plates to blur in your video?
Drop a video or photo in your browser and the AI auto-blurs faces, license plates, and personal info in seconds.
Upload free