Blurring something in a video used to mean placing a blur in one spot and hoping the object didn’t move. But real videos aren’t static—logos shift, screens move, and people walk across the frame.
That’s why BlurMe has upgraded Custom Blur with Keyframe Mode, allowing you to move blur areas across your video timeline so they follow moving objects.
With Keyframe Mode enabled, you can reposition the blur box at different points in the video, and BlurMe will automatically animate the movement between those positions. The result is a blur that smoothly follows logos, text, tattoos, screens, or any other moving element.
What Keyframe Mode Does in Custom Blur
Keyframe Mode allows you to track blur movement across a video timeline.
Instead of a blur staying fixed in one position, you can now:
- Move the blur box as the object moves
- Create timeline markers where blur position changes
- Let BlurMe automatically transition the blur between frames
This makes it possible to blur moving objects in video quickly and accurately.
How to Use Keyframe Mode with BlurMe Custom Blur
Using the new feature is simple and fits directly into the existing BlurMe workflow.
1. Upload Your Video
Open BlurMe Studio and upload your video to start editing.
2. Select Custom Blur
Choose Custom Blur from the settings panel.
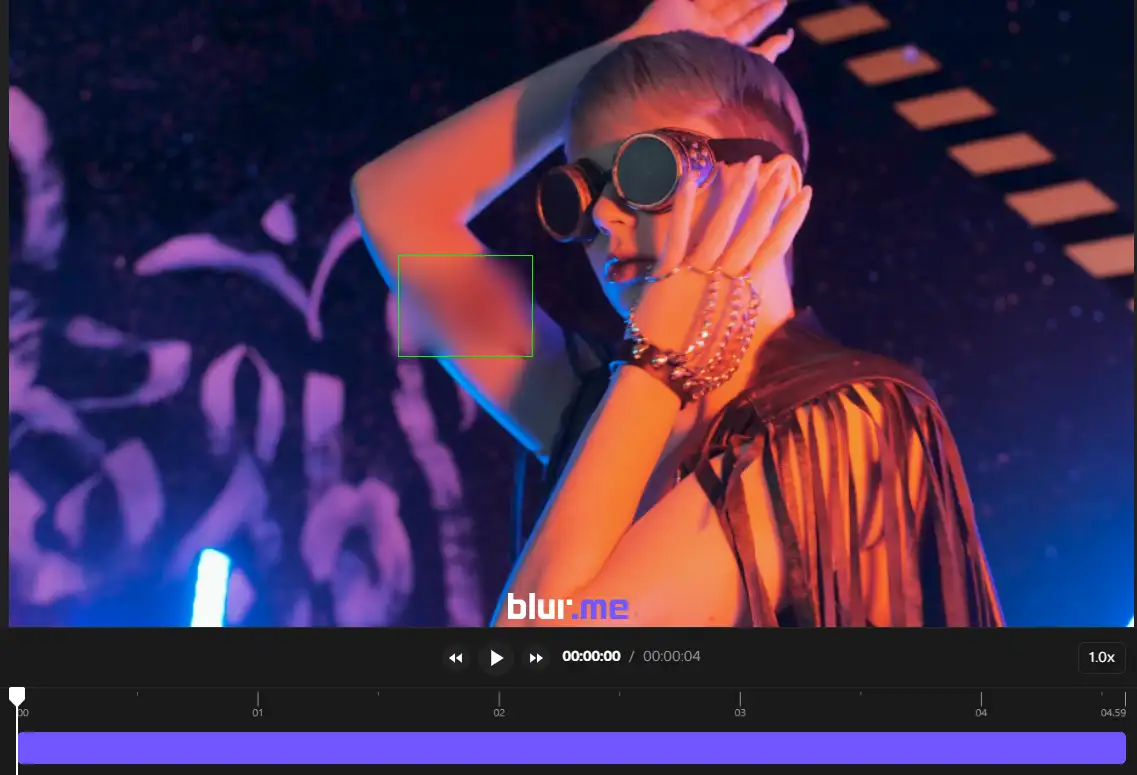
A blur box will appear in the preview window. Drag it to the object you want to hide.
For example:
- a moving logo
- sensitive text
- a phone or laptop screen
- a tattoo

3. Enable Keyframe Mode
Turn on Keyframe Mode in the playback area.
This allows you to adjust the blur position at different points in the video timeline.
4. Track the Object Across Frames
Move through the video frame by frame.
When the object moves away from the blur box:
- Drag the blur box back over the object
- BlurMe will automatically add a keyframe marker
The blur will then move smoothly between those keyframes.
5. Preview the Blur Motion
Press Play to preview the blur tracking.
If something looks off, simply move to that moment in the timeline and reposition the blur again.
- To preview the video without the keyframe markers visible, simply click anywhere on the video screen to hide them.
- If you want to see the markers again or re-enter Keyframe Mode, look in the side panel under the Custom Blur list and click the blur area that shows the keyframe icon.
6. Edit or Delete Keyframes
Each blur movement creates a keyframe marker on the timeline.
If you want to remove an adjustment:
- Click the marker
- Select Delete
This removes the movement for that frame.
7. Export Your Video
Once you're satisfied with the blur tracking:
- Click Done
- Select Export
You can also compress or convert the video before downloading.
Why This Upgrade Is Powerful
Custom Blur with Keyframe Mode makes BlurMe far more flexible for video privacy and editing tasks.
You can now blur moving elements like:
- brand logos
- text on screens
- tattoos or identifying marks
- background signs
- confidential information
Combined with BlurMe face blur technology, this allows you to automatically blur faces while manually tracking other moving objects in the same video.
For more advanced privacy workflows, this also supports AI video redaction service use cases where sensitive content must be hidden before sharing footage.
Blur Moving Objects in Minutes With BlurMe
With Custom Blur + Keyframe Mode, BlurMe now makes it incredibly easy to blur moving objects in video online.
No complicated software.
No manual frame-by-frame editing.
Just upload your video, enable Keyframe Mode, and move the blur as the object moves.
Start now with BlurMe’s Blur video editor and track blur exactly where you need it.