How to Blur Something in a Picture (Fast & Easy)
Maya Chen — Tech Writer & Privacy Advocate Part of: Blur Photo Complete Guide: Methods, Tools & Best Practices (2026)Read the complete guide →
How to Blur Something in a Picture: Selective Area Tutorial 2026
You just shot 200 family photos at the park and now need every bystander's face blurred before posting. Learning how to blur something in a picture manually takes 2 minutes and 5 steps per photo — that's over 6 hours for your entire batch. Miss one face and you risk privacy complaints or platform takedowns. A faster method exists that cuts this workflow to 30 seconds with 3 clicks, letting you batch-process hundreds of photos while you grab coffee. This guide shows you exactly how to blur faces, license plates, backgrounds, or any sensitive area in your pictures using free tools, mobile apps, and desktop software.
Common Approaches to How To Blur Something In A Picture
Blurring something in a picture requires choosing the right method for your specific needs. The blur tool you pick determines how much control you have, how natural the effect looks, and how quickly you can finish the job.
Using Built-in Photo Editor Apps (iPhone/Android)
Your phone already has a blur tool built into the native Photos app. This method works best when you need to blur something quickly without downloading extra apps.
iPhone Photos app lets you blur backgrounds using Portrait mode edits. Open your photo, tap Edit, then tap the f-stop icon at the top. Drag the slider to adjust blur intensity. The limitation: this only works on photos taken in Portrait mode or photos where the app detects a clear subject. You can't selectively blur specific objects like license plates or text.
Android users can use Google Photos' blur feature. Open the photo, tap Edit, select Tools, then choose Blur. Draw over the area you want to blur with your finger. The blur applies in real-time as you drag. This gives you more control than iPhone's automatic background blur, but the blur quality looks softer and less precise than desktop tools.
Desktop Software for Precise Control
Photoshop gives you the most control over blur intensity, blur radius, and edge feathering. Open your image, duplicate the background layer (Ctrl+J on Windows, Cmd+J on Mac), then go to Filter > Blur > Gaussian Blur. Adjust the radius slider until the blur strength matches your needs—typically 10-20 pixels for faces, 30-50 pixels for license plates.
Add a layer mask (click the mask icon at the bottom of the Layers panel), then paint black over areas you want to keep sharp. This selective blur technique lets you blur multiple objects at different intensities in the same photo. The blur brush size and opacity adjustment give you surgical precision.
GIMP (free alternative) follows a similar workflow. Open your image, select the area to blur using the Free Select tool, then go to Filters > Blur > Gaussian Blur. Set the blur radius, click OK, then deselect (Select > None). GIMP's blur tool produces quality comparable to Photoshop but requires more manual steps for complex selections.
Desktop software excels at batch processing. You can record actions in Photoshop or create scripts in GIMP to blur the same area across 100+ photos automatically.
Free Online Blur Tools
Canva offers browser-based blurring without software installation. Upload your photo, click Effects, scroll to Blur, then adjust the slider. Canva applies blur to the entire image by default—you need to upgrade to Canva Pro ($13/month) to use the selective blur tool that lets you blur specific areas.
Fotor (free online blur tool) gives you more control without payment. Upload your image, select the Blur tool from the left sidebar, adjust blur strength (0-100 scale), then paint over the area to blur. The blur effect applies as you drag your cursor. You can adjust blur intensity mid-edit by moving the slider and painting again.
Pixlr Express works entirely in-browser and supports mobile devices. Open your image, tap Tools, select Blur, choose between Gaussian blur (smooth, natural) or pixelate (blocky, mosaic effect), then draw over the area. Pixlr lets you undo individual brush strokes without resetting the entire edit.
Online tools work best for one-off edits. The limitation: file size restrictions (typically 10-25MB max), no batch processing, and you lose editing history when you close the browser.
Mobile Apps for On-the-Go Editing
Snapseed (free for iOS and Android) gives you desktop-level control on mobile. Open your photo, tap Tools, select Selective (the icon with a person and plus sign), place a control point on the area to blur, then pinch outward to expand the selection radius. Swipe down to reveal the menu, select Blur, then swipe left/right to adjust blur strength.
Snapseed's selective blur uses a radial selection—it blurs in a circular area around your control point. This works well for blurring faces or objects, but struggles with irregular shapes like license plates at angles. You can add up to 8 control points per photo to blur multiple areas.
Point Blur (free on both platforms) specializes in privacy protection. Launch the app, import your photo, select the blur type (mosaic effect, pixelate, or gaussian blur), then draw over sensitive information with your finger. Point Blur saves the original and blurred version separately, letting you compare before exporting.
PicsArt offers creative blur effects beyond privacy needs. Open your photo, tap Effects, select Blur, then choose from 15+ blur styles including motion blur, radial blur, and tilt-shift. The background blur tool automatically detects subjects and blurs everything else.
Mobile apps excel at quick edits but lack batch processing. If you need to blur faces across 50 event photos, you'll repeat the same steps 50 times.
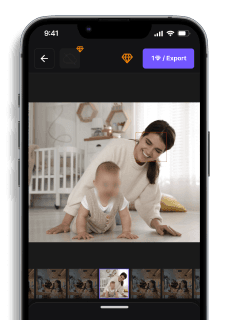
Blur Objects in Photos with AI (Blur.me)
You have 50 conference photos where attendees are holding up branded items you need to hide. Manually selecting and feathering each object in Photoshop? That's 2+ hours of repetitive masking work.
Upload your batch — drag all 50 images at once, and blur.me's detection engine scans each photo in ~3 seconds per file.
Select what to hide — click any detected object to toggle blur on or off; blue bounding boxes show you exactly what's marked before processing.
Export at full resolution — all 50 photos processed in under 5 minutes with zero quality loss, preserving your original 4K dimensions.
When you're batch-processing 50 conference photos in Photoshop at 2+ hours total, every repeated mask-and-feather cycle adds up. Blur.me's detection engine cuts that workflow to under 5 minutes by scanning all 50 images at once and letting you toggle blur per object with a single click.
Faces or plates to hide in your photo?
Upload and the AI blurs them automatically in seconds.
Quick Comparison: How to Blur Something in a Picture Tools
| Feature | Blur.me | Photoshop | Snapseed | GIMP | Canva |
|---|---|---|---|---|---|
| Price | Free (3 photos/day), Pro $12/mo | $22.99/mo (Photography plan) | Free | Free (open-source) | Free (basic), Pro $15/mo |
| Face Detection | AI auto-detect (98%+ accuracy) | Manual selection only | Manual selection only | Manual selection only | Manual selection only |
| Blur Control | Adjustable intensity slider (0-100) | Gaussian Blur 0.1-250px radius | Blur strength 0-100 | Gaussian/Motion blur filters | Blur strength Low/Med/High |
| Steps Required | Full auto (AI detection) | Manual (5 steps: select → feather → filter → adjust → apply) | Manual (4 steps: brush → paint → adjust → save) | Manual (6 steps: path tool → feather → blur filter → preview → adjust → export) | Semi-auto (3 steps: upload → blur tool → adjust region) |
| Time per Photo | ~3 seconds (batch: 100 photos in 5 min) | ~2 minutes per region | ~90 seconds per region | ~3 minutes per region | ~45 seconds per region |
| Platform | Web, iOS, Android | macOS, Windows, iPad | iOS, Android | macOS, Windows, Linux | Web, iOS, Android |
| Best For | Privacy redaction (faces, plates, sensitive info) | Professional photographers needing pixel-perfect control | Mobile users editing on-the-go | Budget creators comfortable with complex software | Social media posts with quick background blur |
Snapseed wins for free mobile editing — the Healing Brush doubles as a blur tool, but you'll manually paint every region. Photoshop justifies its cost with feathered edges and layered blur effects for commercial work. Blur.me automates face detection in 3 seconds per photo, saving 19 minutes on a 10-photo batch compared to Photoshop's manual workflow.
FAQ
Can I blur images on my phone?
Yes. iPhone users can use the native Photos app's Markup tool to blur specific areas—tap Edit → three-dot menu → Markup → pen tool set to maximum thickness. For more control, download Snapseed (free) or Point Blur ($2.99) which offer adjustable blur intensity and feather edges. Android users should try Snapseed or PicsArt (free with ads). Mobile blur tools process a single photo in 3-5 seconds.
Can I add blur to a photo at a specific place?
Absolutely. Most photo editors offer a blur brush tool for selective blurring. In Photoshop ($22.99/month), use the Blur Tool (R key) and paint over the area—adjust brush size and blur strength in the top toolbar. Free alternatives include GIMP (desktop) or Fotor (online)—both let you select and blur specific regions. For batch processing multiple photos with faces, blur.me auto-detects and blurs faces in ~3 seconds per image.
Can I blur a photo after I've taken it?
Yes—blurring is a post-processing effect applied during editing, not at capture time. Open your photo in any editor (Canva, Snapseed, Photoshop) and apply selective blur to hide license plates, faces, or background clutter. iPhone's Portrait Mode creates natural background blur at capture, but you can adjust blur intensity afterward in the Photos app. For privacy protection, always blur sensitive information before sharing photos online.
What's the difference between pixelate and gaussian blur for hiding information?
Pixelate converts an area into large square blocks—best for completely obscuring text or faces where readability must be zero. Gaussian blur creates a smooth, soft effect by averaging neighboring pixels—works for backgrounds or partial privacy where complete obscurity isn't required. Mosaic effect (a pixelate variant) offers medium security. For GDPR compliance or publishing children's photos, use pixelate with blur radius ≥20px to ensure text remains unreadable even when enhanced.
How do I blur multiple areas in one photo efficiently?
Use a blur brush with adjustable opacity in desktop software like Photoshop or GIMP—paint over each area separately, then adjust blur strength globally. For photos with multiple faces, batch blur tools save time: blur.me processes 100 photos in ~5 minutes by auto-detecting all faces at once. Online tools like Canva require manual selection per area but work without software installation. Avoid re-exporting the same image multiple times—quality degrades with each save.
Manual blurring takes 2 minutes per photo—multiply that across 100 event photos and you've lost 3+ hours. For recurring privacy tasks, batch-process faces automatically or redact sensitive documents instead of repeating the same steps.
Faces or plates to hide in your photo?
Drop a photo or video in your browser and the AI auto-blurs faces, license plates, and personal info in seconds.
Upload free