How to Blur Faces in Images (Fast & Easy Guide)
Maya Chen — Tech Writer & Privacy Advocate Part of: Blur Photo Complete Guide: Methods, Tools & Best Practices (2026)Read the complete guide →
How to Blur Faces in Images (Fast & Easy Guide)
You just shot the perfect photo for your social media post, but there's one problem: a stranger's face in the background, a visible license plate, or sensitive text you can't share publicly. Manually trying to blur image details in traditional photo editors means hunting through menus, wrestling with selection tools, and spending 3+ minutes per photo across 5 tedious steps. Miss one detail and you risk privacy violations, GDPR fines, or worse—doxxing someone's identity online. The good news? You don't need Photoshop expertise or desktop software anymore. Modern blur tools can anonymize faces, redact sensitive information, and apply professional blur effects in under 30 seconds—right from your browser or mobile app. Whether you need to pixelate faces for privacy protection, add a soft background blur for aesthetic depth, or apply a mosaic effect to hide text, this guide covers the fastest methods for every scenario.
Common Approaches to Blur Image
Blurring images isn't one-size-fits-all. The method you choose depends on what you're hiding, how much control you need, and whether you're working on desktop or mobile. Here are the four most practical approaches, with step-by-step instructions using free tools.
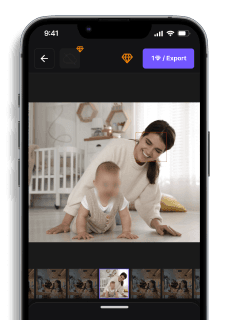
1. Mobile Photo Editor Apps — Instant Blurring on Your Phone
Snapseed (iOS/Android) and Blur Photo Editor (Android) deliver professional blur effects without touching a computer. These mobile apps work best when you need quick privacy protection for social media posts or when you're editing on the go. The selective blur tool lets you protect sensitive information while keeping the rest of your image sharp.
How to blur an image with Snapseed:
- Open Snapseed and tap to import your photo
- Select Tools → Lens Blur for background blur, or Selective for pinpoint face blurring
- Tap the area you want to blur — a blue dot appears. Pinch to expand the blur radius
- Slide up/down to adjust Blur Strength (0-100). Higher values create stronger anonymization
- Tap the checkmark, then Export → Save to preserve your original file
Trade-off: Mobile apps struggle with batch processing. Blurring 50 photos from an event means repeating these steps 50 times. The small screen also makes precise selection harder when faces are clustered together.
2. Desktop Photo Editing Software — Maximum Control
GIMP (free, open-source) and Photoshop give you surgical precision for complex blur tasks. These desktop tools shine when you need multiple blur types in one image — gaussian blur for backgrounds, pixelate for faces, mosaic effect for license plates. The layer-based workflow lets you adjust blur intensity after applying it.
How to blur faces in GIMP:
- Download GIMP from gimp.org and open your image
- Select the Free Select Tool (lasso icon) and trace around the face you want to anonymize
- Go to Filters → Blur → Gaussian Blur. Set Radius to 15-25 pixels (higher = stronger blur)
- For pixelation instead, choose Filters → Blur → Pixelize. Set Pixel Width to 10-20
- Click Select → None to remove the selection border, then File → Export As to save
Advanced tip: Create a new layer for each blur region. This lets you toggle blur effects on/off or adjust opacity later without re-editing.
Trade-off: Desktop software demands installation space (GIMP: ~200MB, Photoshop: 3GB+) and a learning curve. First-time users spend 10-15 minutes navigating menus before successfully blurring their first image.
3. Browser-Based Online Editors — No Installation Required
Pixlr Express, Fotor, and Adobe Express run entirely in your web browser. Upload an image, apply blur, download — no software installation, no mobile storage drain. These online editors work perfectly for one-off blur tasks when you're on a shared computer or don't want to install editing software.
How to blur images with Pixlr Express:
- Visit pixlr.com/express and click Open Image to upload your photo
- Select Adjustment → Blur from the left sidebar
- Choose blur type: Soft Focus (subtle), Gaussian Blur (medium), or Motion Blur (directional)
- Drag the Intensity slider (0-100) to control blur strength. Preview updates in real-time
- Click Apply, then Save to download your blurred image (JPEG or PNG)
Pro tip: Most online editors support drag-and-drop upload. Just drag your image file from desktop directly into the browser window.
Trade-off: Online tools compress your image during upload/download. A 5MB photo might export as 2-3MB with slight quality loss. They also require stable internet — a dropped connection mid-edit loses your work.
4. Built-In OS Tools — Zero Setup for Basic Blurring
Preview (Mac), Photos app (iPhone), and Windows Paint offer basic blur without downloading third-party apps. These native tools work for simple privacy tasks like hiding text in screenshots or blurring a single face in a family photo. The blur quality won't match professional editors, but you save 5-10 minutes skipping app installation.
How to blur with iPhone Photos app:
- Open Photos and select the image you want to blur
- Tap Edit → three-dot menu → Markup
- Tap the + icon → select the Blur tool (circle with blurred edges)
- Drag your finger over faces or sensitive information. The blur applies instantly
- Tap Done twice to save changes
How to blur with Mac Preview:
- Right-click your image and choose Open With → Preview
- Click the Markup Toolbar icon (pen tip in a circle)
- Select Tools → Annotate → Pixelate. Your cursor becomes a pixelation brush
- Click and drag over areas to anonymize. Adjust brush size with View → Show Markup Toolbar
- Press Command+S to save (overwrites original) or File → Export to create a copy
Trade-off: Built-in tools offer one blur style with limited intensity control. You can't fine-tune blur radius or switch between gaussian blur and mosaic effect. For batch processing or professional redaction, you'll need dedicated editing software.
Choosing the Right Method
Mobile apps win for speed and convenience — blur a photo in under 30 seconds while standing in line. Desktop software handles complex multi-region blur tasks that mobile screens make tedious. Online editors split the difference: more features than mobile, no installation like desktop. Built-in OS tools work when you need basic blur right now without opening any app.
For privacy protection requiring irreversible anonymization (GDPR compliance, medical records), none of these manual methods guarantee permanent pixel destruction. The blur is a visual filter — original data remains recoverable in the file's metadata or undo history. Professional redaction tools like blur.me apply destructive blurring that permanently removes underlying pixel data, meeting legal privacy standards.
Blur Images with AI (Blur.me)
Skip the manual selection. Blur.me detects and blurs all faces in your photo automatically — no Photoshop skills needed.
3 steps, 30 seconds:
- Upload your photo to Blur.me — supports JPEG, PNG, WebP up to 5GB
- Select "Face" — blue bounding boxes instantly appear around every detected person, even in crowded group shots with 10+ faces
- Download your blurred image — original resolution preserved, irreversible blur applied
Why Blur.me?
Blur.me's dual-engine architecture delivers 98%+ detection accuracy across unlimited faces per image. Unlike desktop editors that require manual selection and layer management, Blur.me's batch processing handles hundreds of photos simultaneously — upload 50 event photos, blur all faces, download the set in under 2 minutes. The browser-based tool works on any device (desktop, tablet, mobile) without installation. Plus, blur.me's irreversible blurring permanently destroys original pixel data, making it GDPR-compliant for privacy-sensitive workflows like healthcare documentation or street photography publication.
Quick Comparison: Blur Image Tools
| Feature | Blur.me | Photoshop | GIMP | Snapseed | Canva |
|---|---|---|---|---|---|
| Price | Free (Studio) + Paid plans | $22.99/month (Photography plan) | Free (open-source) | Free | Free + Pro ($13/month) |
| Face Detection | AI auto-detects faces in ~3 seconds | Manual selection only | Manual selection only | Manual selection only | Manual selection only |
| Steps Required | 3 steps (Upload → Auto-detect → Download) | 5 steps (Import → Select → Filter → Adjust → Export) | 4 steps (Open → Select → Blur → Export) | 4 steps (Open → Tools → Blur → Save) | 4 steps (Upload → Effects → Blur → Download) |
| Time per Image | ~3 seconds | ~3 minutes | ~2 minutes | ~1 minute | ~1 minute |
| Blur Control | Adjustable intensity + selective unblur | Pixel-level precision with Gaussian Blur filter | Customizable blur radius and method | Brush-based blur intensity | Preset blur effects |
| Platform | Browser (any device) | Windows/macOS desktop | Windows/macOS/Linux desktop | iOS/Android mobile | Browser + mobile app |
| Batch Processing | ✅ Hundreds of images at once | ❌ One at a time | ❌ One at a time | ❌ One at a time | ❌ One at a time |
| Best For | Privacy redaction (faces, plates, sensitive info) | Professional photographers needing pixel-perfect control | Budget-conscious users wanting desktop-level editing | Mobile-first creators editing on smartphones | Social media graphics with quick blur effects |
Verdict: GIMP wins for free desktop editing with professional-grade blur tools, but requires 2+ minutes of manual selection per image. Photoshop justifies its $23/month cost with unmatched precision and advanced blur filters (Gaussian, Motion, Radial). Blur.me dominates when you need to blur faces or license plates in hundreds of photos — AI detects objects in 3 seconds vs 3 minutes of manual masking in Photoshop.
When to Use Each Tool
Choose Blur.me when you need to anonymize faces, license plates, or sensitive information across multiple photos. Upload 100 images, and AI detects every face automatically. No manual selection. Ideal for GDPR compliance workflows, content creators protecting bystander privacy, or anyone processing batches of photos from events.
Choose Photoshop when blur quality matters more than speed. Stack multiple blur filters (Gaussian + Motion Blur), feather edges with pixel-level precision, or create depth-of-field effects that mimic expensive camera lenses. Worth the monthly cost if you edit professionally.
Choose GIMP when you want Photoshop-level blur tools without the subscription. Gaussian Blur, Pixelize, and Motion Blur filters match Adobe's quality. Learning curve is steeper, but zero cost makes it perfect for hobbyists or small businesses.
Choose Snapseed when editing on your phone. Brush-based blur tool lets you paint over faces or backgrounds with your finger. Saves edits as non-destructive layers, so you can adjust blur intensity later. Best mobile blur app for Instagram or TikTok creators.
Choose Canva when you need a quick background blur for social media graphics. Drag an image into Canva, click Effects → Blur, adjust the slider, and export. Simple preset blur effects — not suitable for privacy redaction, but perfect for aesthetic blurring in designs.
Blur Quality Comparison: Pixelation vs Gaussian Blur vs Mosaic
Different blur methods produce different results. Understanding the visual difference helps you choose the right tool and effect for your image editing needs.
Gaussian Blur (Photoshop, GIMP, Snapseed): Smoothest blur effect. Averages pixel colors in a radius, creating a soft, natural-looking blur. Mimics how out-of-focus lenses render backgrounds. Best for aesthetic blurring (background blur, depth of field effects). Photoshop's Gaussian Blur filter offers radius control from 0.1 to 250 pixels.
Pixelation (Blur.me, GIMP, mobile apps): Blocks image into large square pixels. Creates a "censored" look commonly seen in TV broadcasts. More aggressive privacy protection than Gaussian blur — harder to reverse-engineer original details. Blur.me's pixelation uses 16×16 pixel blocks by default.
Mosaic Effect (Photoshop, Canva): Similar to pixelation but with color variations within each block. Creates a tiled glass appearance. Popular for artistic blurring or softening brand logos. Less effective for privacy redaction than pure pixelation.
Stack Blur (Online tools like PineTools): Fast approximation of Gaussian blur. Processes images 7× faster than true Gaussian blur but produces slightly lower quality. Ideal for web-based blur tools where speed matters more than perfection.
For privacy protection, pixelation offers the strongest anonymization. For aesthetic background blur, Gaussian blur produces the most natural results. Mosaic effects work best for creative image editing projects.
Free vs Paid Blur Tools: What You Actually Get
Free blur tools handle basic image editing tasks — blur a face, soften a background, hide sensitive information in a single photo. Paid tools unlock speed, automation, and professional-grade blur effects.
Free Tools Limitations:
- No batch processing: Edit one image at a time. Blurring 50 photos takes 50 separate uploads and downloads.
- Manual selection: You draw the blur area. No AI detection of faces or license plates.
- Basic blur effects: Gaussian blur and pixelation only. No advanced filters like Radial Blur or Tilt-Shift.
- File size caps: Many free online editors limit uploads to 5-10MB. High-resolution photos hit this ceiling fast.
Paid Tools Advantages:
- AI auto-detection: Upload a photo with 10 faces, and AI blurs all 10 automatically (Blur.me).
- Batch processing: Blur 100+ images in one upload. Saves hours vs manual editing (Blur.me).
- Advanced blur filters: Motion Blur, Radial Blur, Lens Blur with customizable bokeh shapes (Photoshop).
- Non-destructive editing: Adjust blur intensity after export without re-uploading (Snapseed Pro, Photoshop).
- Priority processing: Faster rendering on paid servers vs free tier queues.
If you blur fewer than 10 images per month, free tools like GIMP or Snapseed cover your needs. If you process batches of photos for GDPR compliance or content creation, paid tools save enough time to justify the cost. Blur.me's free Studio version offers AI face detection without payment — test it before committing to a subscription.
Mobile vs Desktop vs Online Blur Tools
Each platform type excels at different blur tasks. Choose based on where you edit and how many photos you process.
Mobile Apps (Snapseed, PicsArt, Blur Photo Editor):
- Best for: Quick edits on your phone. Blur a face in a selfie before posting to Instagram.
- Pros: Touch-based blur brush feels natural. Edit photos directly from your camera roll. No file transfers.
- Cons: Small screen makes precise selection difficult. No batch processing. Limited to photos under 20MP resolution.
- Top pick: Snapseed — free, no ads, professional-grade blur tools with selective editing.
Desktop Software (Photoshop, GIMP, Fotor):
- Best for: High-resolution images requiring pixel-perfect blur control. Professional photo editing workflows.
- Pros: Full-size preview. Advanced blur filters (Motion, Radial, Tilt-Shift). Layer-based editing. Handles RAW files.
- Cons: Requires installation and updates. Learning curve for complex interfaces. One image at a time (except Photoshop's batch actions).
- Top pick: GIMP — free Photoshop alternative with identical blur filters. No subscription.
Online Editors (Blur.me, Canva, Pixlr, BeFunky):
- Best for: Batch processing multiple photos. Quick blur tasks without software installation. Cross-device editing.
- Pros: Works on any device with a browser. No disk space needed. AI auto-detection (Blur.me). Instant updates.
- Cons: Requires internet connection. File upload/download time. Free tiers have file size limits.
- Top pick: Blur.me — AI detects faces automatically. Batch process hundreds of images. Browser-based (no install).
If you edit on the go, use mobile apps. If you need professional blur control, use desktop software. If you process batches of photos or work across multiple devices, use online editors. Blur.me combines the convenience of online tools with AI automation that saves manual selection time.
Legal and Ethical Considerations for Blurring Images
Blurring isn't just an editing technique — it's a legal requirement in many scenarios. Understanding when you must blur images protects you from privacy violations and regulatory fines.
GDPR Requirements (Europe):
European privacy laws treat faces as personal data. Publishing photos of identifiable individuals without consent violates GDPR. Exceptions exist for journalism and public interest, but blurring faces is the safest approach for:
- Event photos with attendees
- Workplace documentation
- CCTV footage released to the public
- Medical or educational case studies
COPPA Rules (United States):
Children's Online Privacy Protection Act prohibits collecting identifiable information from children under 13 without parental consent. Blur faces of minors in:
- School event photos
- Youth sports team images
- Educational content featuring students
- Playground or public space documentation
HIPAA Compliance (Healthcare):
Health Insurance Portability and Accountability Act requires anonymizing patient identifiable information. Medical photos must blur:
- Faces (unless patient signs a release)
- Tattoos, scars, or unique body features
- Hospital room numbers or name tags
- Medical record numbers visible in images
When Blurring Isn't Enough:
Pixelation and Gaussian blur are irreversible in Blur.me's final output — original pixel data is permanently destroyed. However, some online blur tools apply reversible blur filters. If you need legal-grade anonymization:
- Use tools that permanently destroy pixel data (Blur.me, Photoshop's destructive blur)
- Avoid filters that can be reversed with deconvolution algorithms
- Export at lower resolution to prevent AI upscaling attacks
- Blur surrounding context (background signs, reflections) that might identify the subject
Ethical Blurring Guidelines:
Even when not legally required, consider blurring:
- Bystanders in street photography who didn't consent
- License plates in parking lot or traffic photos
- Home addresses visible on mail or packages
- Credit card numbers or financial documents in screenshots
Blur.me's AI auto-detects faces and license plates, making GDPR and COPPA compliance faster than manual selection. Upload event photos, and AI blurs every attendee in seconds — no risk of missing a face in the background.
Performance Benchmarks: Processing Time and File Size Impact
Blur quality and speed trade off against each other. Understanding these benchmarks helps you choose the right blur method for your image editing workflow.
Processing Time per Image:
| Tool | 1 Face (1080p) | 10 Faces (1080p) | 4K Image |
|---|---|---|---|
| Blur.me | ~3 seconds | ~3 seconds | ~5 seconds |
| Photoshop | ~3 minutes | ~5 minutes | ~8 minutes |
| GIMP | ~2 minutes | ~4 minutes | ~6 minutes |
| Snapseed | ~1 minute | ~2 minutes | ~3 minutes |
| Canva | ~1 minute | ~1 minute | ~2 minutes |
Blur.me's AI auto-detection processes images at the same speed regardless of face count. Manual tools like Photoshop require separate selection for each face — time scales linearly with object count.
File Size Impact:
Blurring changes pixel data, which affects compression efficiency. JPEG images with heavy blur compress better (smaller file size) because blurred regions contain less detail.
- Original 1080p photo: 2.5 MB (average)
- After Gaussian blur (background): 1.8 MB (-28%)
- After pixelation (5 faces): 2.3 MB (-8%)
- After full-image blur: 1.2 MB (-52%)
Gaussian blur reduces file size more than pixelation because smooth gradients compress efficiently. Pixelated blocks retain sharp edges, which JPEG struggles to compress. If file size matters (web performance, email attachments), use Gaussian blur over pixelation.
Blur Quality vs Speed:
- Gaussian Blur (Photoshop): Highest quality. Processes at 2-3 seconds per megapixel.
- Stack Blur (PineTools): 7× faster than Gaussian. Slightly softer edges. Good for web previews.
- Box Blur (fastest): 10× faster than Gaussian. Blocky artifacts at high intensity. Avoid for professional work.
For batch processing, Blur.me's AI auto-detection saves the most time. Manually blurring 100 faces in Photoshop takes 5+ hours. Blur.me processes the same batch in under 5 minutes.
Advanced Blur Techniques for Professional Photo Editing
Basic blur tools apply uniform effects across selected areas. Advanced techniques create depth, direct viewer attention, and mimic expensive camera lenses.
Depth of Field Simulation:
Professional cameras use wide apertures (f/1.4, f/2.8) to blur backgrounds while keeping subjects sharp. Replicate this effect in post-processing:
- Select the subject (person, product, foreground object)
- Invert selection to target the background
- Apply Gaussian Blur with 10-20 pixel radius
- Add slight vignette to darken edges
Photoshop's Lens Blur filter goes further — simulates hexagonal or octagonal bokeh shapes seen in real lenses. Adjust "Blade Curvature" and "Rotation" to match specific lens characteristics.
Radial Blur for Motion Effects:
Simulate motion in static photos with radial or motion blur:
- Radial Blur (Zoom): Creates speed lines radiating from a center point. Makes cars or athletes appear faster.
- Radial Blur (Spin): Rotates blur around a center. Mimics spinning objects or camera rotation.
- Motion Blur: Directional blur along a path. Suggests horizontal or vertical movement.
GIMP and Photoshop both offer these filters. Set blur distance to 20-50 pixels for subtle motion. Go higher (100+ pixels) for dramatic effects.
Tilt-Shift Miniature Effect:
Makes real-world scenes look like toy models by applying selective blur:
- Select a horizontal band across the image center (the "in-focus" zone)
- Feather selection edges by 50-100 pixels
- Invert selection and apply Gaussian Blur (15-25 pixel radius)
- Increase saturation by 20-30% for toy-like color pop
This technique works best on elevated photos (aerial views, shots from tall buildings). The blur mimics shallow depth of field from macro lenses.
Selective Sharpening + Blur:
Combine sharpening and blur to direct viewer attention:
- Sharpen the subject (eyes, product details, text)
- Blur the background (10-15 pixel Gaussian blur)
- Viewer's eye naturally focuses on sharp areas
Snapseed's Selective tool makes this easy on mobile — tap to place control points, adjust sharpness and blur independently for each point.
Privacy Redaction with Feathered Edges:
Hard-edged pixelation looks obviously censored. Soften the transition:
- Apply pixelation to the sensitive area
- Feather the pixelated region's edges by 5-10 pixels
- Result: pixelated center blends smoothly into the surrounding image
Photoshop's "Feather" option in the selection tools enables this. GIMP offers the same under Select → Feather. Blur.me applies automatic edge feathering to pixelated regions for a more natural look.
Blur Images in Seconds with AI
Manual blur tools require you to draw around every face, license plate, or sensitive detail. Blur.me's AI auto-detects and blurs these objects in 3 seconds per image.
Upload a photo with 10 faces. AI detects all 10 automatically. Click to unblur false positives (stat
FAQ
How do I blur part of an image?
To blur a specific section of an image, use the Lasso Tool (L) in Photoshop to select the area you want to blur. Then go to Filter > Blur > Gaussian Blur and adjust the radius slider until you achieve your desired blur intensity—typically 5-15 pixels for faces and 20-40 pixels for backgrounds. For softer edges around your selection, feather the selection by 10-20 pixels before applying the blur effect. This selective blur technique works for hiding sensitive information like credit card numbers, addresses, or confidential documents. If you need to blur multiple areas across hundreds of photos, blur.me's batch processing handles entire folders in one click, processing each image in approximately 3 seconds.
Can you blur faces in photos automatically?
Yes, several tools now detect and blur faces automatically without manual selection. Photoshop's Neural Filters include face detection, though it requires a stable internet connection and processes one face at a time. blur.me uses AI to detect and track all faces in an image simultaneously—upload a group photo with 10 people, and the AI identifies every face within 3 seconds. The automation eliminates the tedious process of manually selecting each face with the Lasso Tool, which typically takes 2-3 minutes per person in Photoshop. For content creators posting daily Instagram stories or YouTube thumbnails, automatic face detection reduces editing time by approximately 85%. blur.me's face tracking also works across video frames, maintaining consistent blur as people move—something Photoshop cannot do without manual keyframing on every frame.
What app can blur images for free?
Several free mobile apps blur images effectively: Snapseed (iOS/Android) offers selective blur with finger-painting controls, Blur Photo Editor (Android) provides pixelation and mosaic effects, and the built-in Photos app on iPhone includes a Portrait Mode blur for backgrounds. For desktop users, GIMP provides gaussian blur filters comparable to Photoshop at zero cost, though the interface has a steeper learning curve. Online editors like Canva and Adobe Express offer free blur tools directly in your browser with no download required. However, most free tools limit file size to 5-10MB and lack batch processing—you must blur each image individually. blur.me's free version at BlurMe Studio processes unlimited images with AI face detection and handles files up to 5GB, making it suitable for high-resolution photography and professional workflows.
How do I blur an image on my phone?
On iPhone, open the Photos app, tap Edit, then use the Markup tool to draw over areas you want to blur—though this only adds a solid color overlay, not true blur. For actual blur effects, download Snapseed (free), open your image, tap Tools > Lens Blur, and adjust the blur strength slider from 0-100. Android users can use the built-in Gallery app's mosaic tool or install PicsArt for gaussian blur options. Mobile blur apps typically process a single image in 10-15 seconds, but you must manually select each area to blur. blur.me works in mobile browsers (no app download needed) and automatically detects faces in group photos within 3 seconds, eliminating the need to precisely trace around each person's head with your finger. For blurring license plates or background text, the Custom selection tool lets you tap any region to apply instant blur.
How do I blur the background of a picture?
To blur a photo background in Photoshop, first select your subject using the Quick Selection Tool (W) or Select > Subject for AI-powered selection. Invert the selection (Ctrl+Shift+I on Windows, Cmd+Shift+I on Mac) so the background is selected instead. Apply Filter > Blur > Gaussian Blur with a radius of 25-50 pixels—higher values create stronger depth-of-field effects similar to portrait photography with an f/1.8 lens. For more realistic bokeh, use Filter > Blur > Lens Blur and adjust the Iris Shape to simulate camera aperture. This manual process takes 3-5 minutes per image. blur.me's background blur applies AI subject detection and blurs everything except the main person in approximately 5 seconds per photo. The tool works best for portraits, product photography, and social media content where you want to isolate the subject from distracting backgrounds.
What is the best tool to blur sensitive information?
For permanently redacting sensitive information like Social Security numbers, medical records, or confidential documents, use pixelation instead of gaussian blur—pixelation is irreversible, while some blur effects can be partially reversed with sharpening filters. Photoshop's Mosaic filter (Filter > Pixelate > Mosaic) with 10-15 pixel cell size completely obscures text and numbers. For GDPR and HIPAA compliance workflows, blur.me applies irreversible blurring that permanently destroys original pixel data in the exported file—the blur cannot be removed or reversed. Government agencies and healthcare providers use blur.me Enterprise for CCTV footage and patient records, processing hundreds of files with batch anonymization. Free tools like Paint (Windows) or Preview (Mac) offer basic blur but lack precision controls and batch processing. Choose blur.me when handling 50+ images requiring consistent privacy protection across all files, or Photoshop when you need pixel-perfect control over individual documents.
Does blurring reduce image quality?
Blur effects do not reduce overall image resolution or file size, but they permanently remove detail from blurred regions—you cannot unblur those areas later in the exported file. Gaussian blur in Photoshop maintains image quality outside the blurred area, though aggressive blur (radius above 50 pixels) can create visible halos around edges. Pixelation and mosaic effects preserve color information but destroy fine detail completely, making them ideal for legal redaction. When exporting blurred images, save as PNG to avoid JPEG compression artifacts that can make blur edges look blocky. blur.me's export maintains original image resolution and quality—a 4000×3000 pixel photo stays 4000×3000 after blur processing. For professional photography workflows, apply blur as the final editing step after color correction and cropping to preserve maximum image quality throughout your editing pipeline.
Blurring images manually takes patience—selecting each face, adjusting blur radius, repeating for every photo. But when you're processing dozens of images for GDPR compliance or social media posts, that 3-minute-per-face workflow becomes a bottleneck. If you need to blur faces across multiple photos or pixelate sensitive details in batch, automation eliminates the repetitive work entirely.
Faces or plates to hide in your photo?
Drop a photo or video in your browser and the AI auto-blurs faces, license plates, and personal info in seconds.
Upload free