How to blur an image usually means one of three things: you want to blur a face, blur part of a photo, or blur the background. This tutorial shows how to do all three using BlurMe, an online image blur tool that works directly in your browser.
You don’t need to install software or learn photo editing. The steps are the same whether you’re blurring a single detail or multiple areas in an image.
How to Blur an Image Online Using BlurMe
Blurring an image with BlurMe is designed to be quick and controlled.
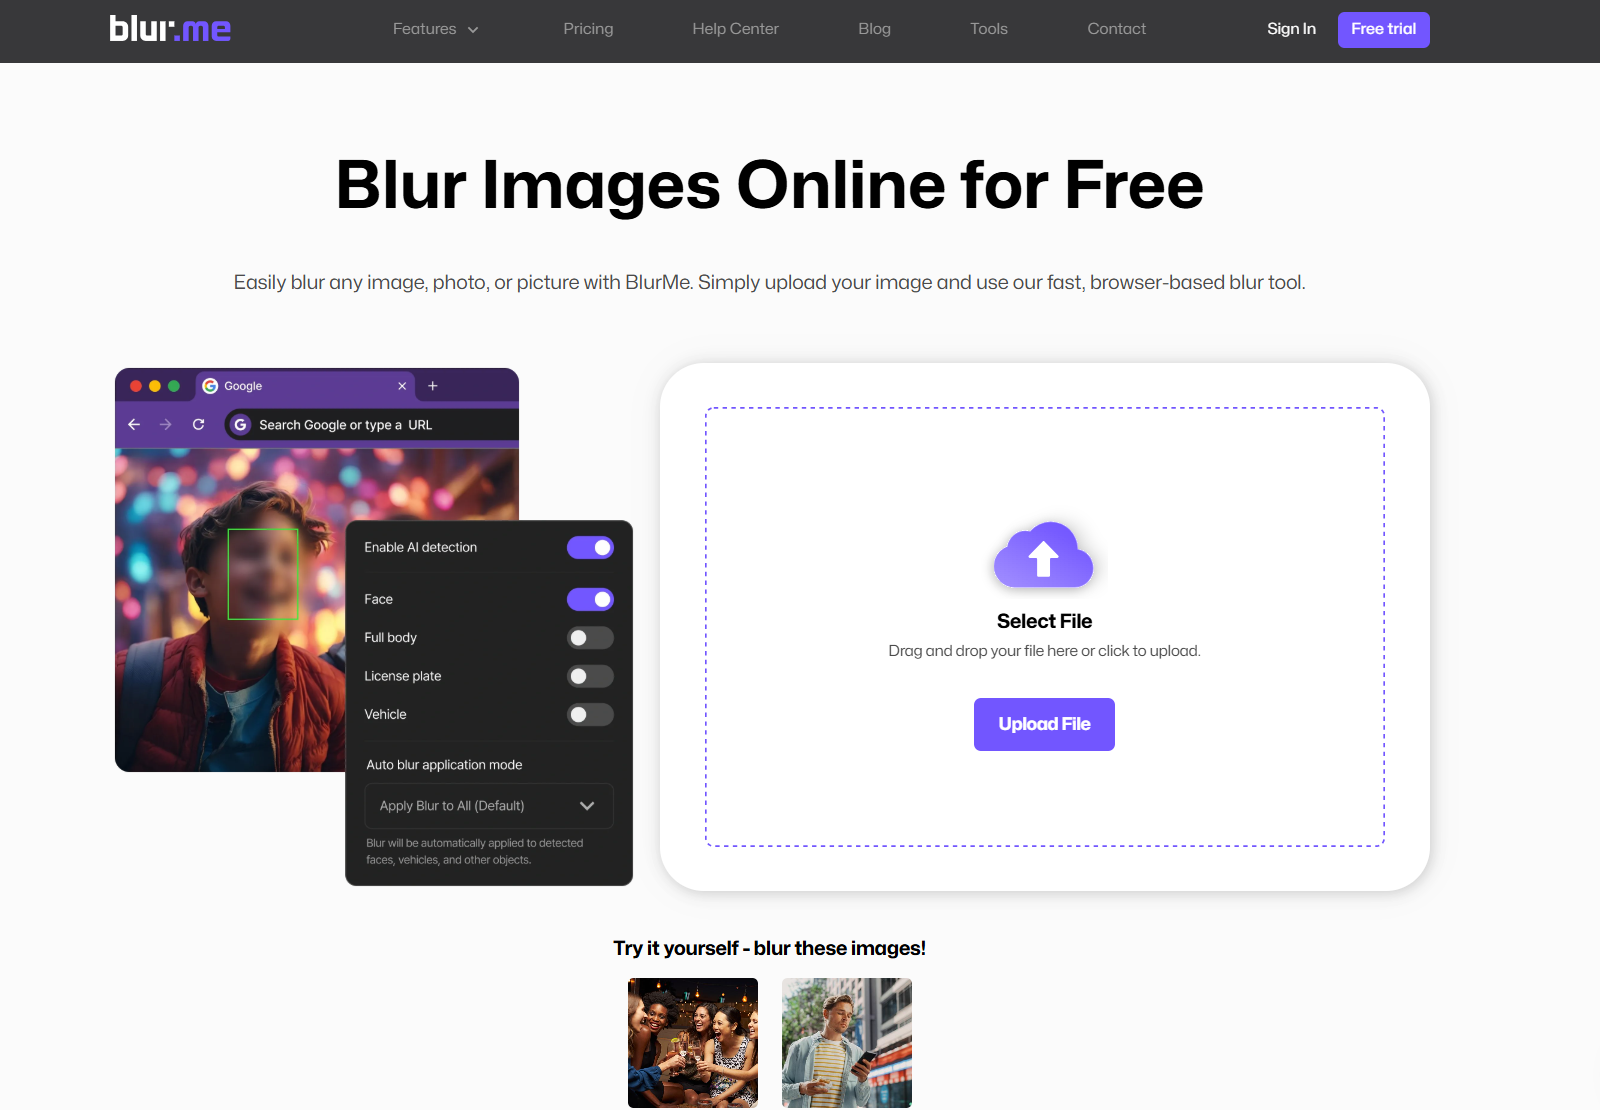
Start by opening the Blur Image Tool and uploading your image. Once the image loads, BlurMe analyzes it automatically. If faces are detected, they’ll be ready to blur immediately. If not, you can manually select any area you want to blur.
From here, you decide what needs to be hidden and how strong the blur should be.
Step-by-Step: Blur an Image in 4 Steps
Step 1: Upload Your Image
Upload the photo you want to blur. BlurMe supports common formats like JPG and PNG.
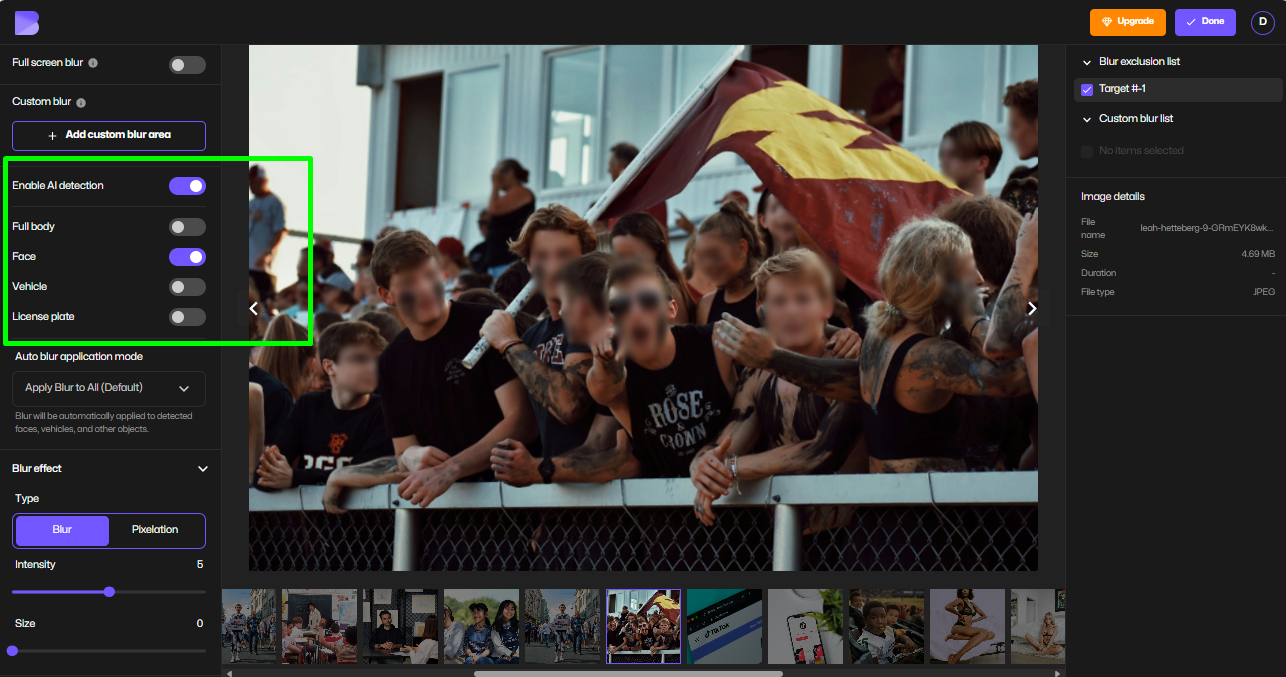
Step 2: Select the Blur Type
Choose how you want to blur the image:
- Face blur to automatically blur detected faces
- Custom blur to blur a specific area
- Background blur to blur everything behind the subject
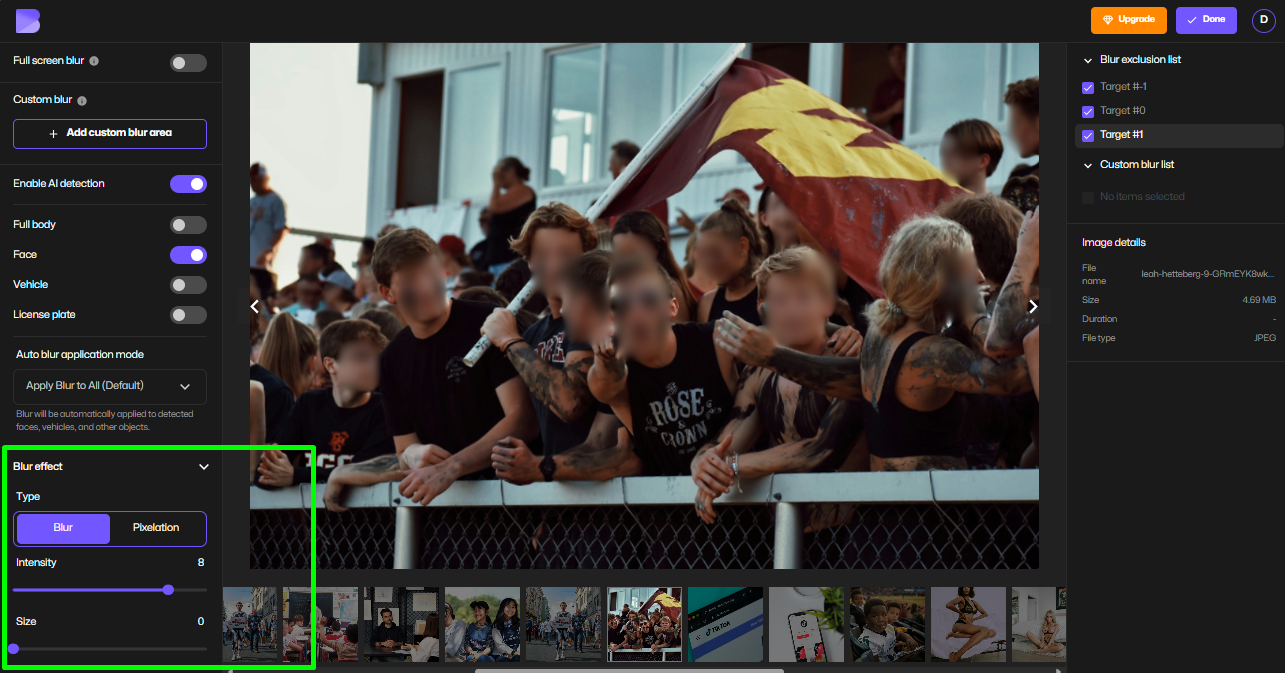
Step 3: Adjust the Blur Strength
Use the slider to control how strong the blur effect is. Increase it for privacy. Lower it for a softer look.
Step 4: Download the Blurred Image
Once the blur looks right, download the image. The rest of the photo stays sharp.

How to Blur Part of an Image
If you only need to blur part of a photo — such as text, a logo, or a person in the background — use the custom blur option.
Upload the image, draw over the area you want to blur, then adjust the blur strength until the detail is no longer readable. This method is useful when only small parts of an image need to be hidden, and it avoids unnecessary blurring elsewhere.
For face-specific use cases, see the Blur Face in Image tool.
How to Blur a Face in an Image Automatically
Blurring faces is one of the most common reasons people search for how to blur an image.
With BlurMe, faces are detected automatically. After uploading your image, you can apply blur to faces with a single click, then fine-tune the strength if needed. This saves time compared to manually drawing blur shapes over each face.
You can also learn more in the Face blur app guide.
How to Blur a Background in a Photo
Background blur is useful when the subject is clear but the surroundings are distracting or sensitive.
After uploading your image, select the background blur option. BlurMe separates the subject from the background automatically, allowing you to blur only the background while keeping the main subject sharp.
For a dedicated walkthrough, visit the Blur Background page.
Tips for Better Image Blurring Results
A few small adjustments can make a blurred image look cleaner and more natural.
Use the lowest blur strength that still hides the detail. Strong blur can draw attention if overused. When blurring faces or text, check the edges to make sure the blur fully covers the area without bleeding into nearby details.
Zooming in before exporting helps catch small areas that may need extra coverage.
Is BlurMe Free to Use?
BlurMe offers a free image blur tool that works online without downloads. You can blur images, faces, and backgrounds directly in your browser.
For a full overview of online blurring features, see the Blur image online.
FAQ: How to Blur an Image
Can I blur an image online for free?
Yes. BlurMe allows you to blur images online for free.
Can I blur only part of a picture?
Yes. You can blur specific areas without affecting the rest of the image, especially using BlurMe's face blur features.
Can I blur faces automatically?
Yes. Faces are detected and blurred automatically.
Blur Your Image Online with BlurMe
If you need a simple, reliable way to blur an image — whether it’s a face, background, or specific detail — BlurMe gives you control without complexity.
👉Try Blur your image online with BlurMe