How to Pixelate an Image: A Simple Guide to Pixelation
Maya Chen — Tech Writer & Privacy Advocate Part of: Blur Photo Complete Guide: Methods, Tools & Best Practices (2025)Read the complete guide →
How to Pixelate an Image (Fast & Easy Guide)
You just uploaded 50 event photos to share online, but three strangers wandered into the background — and now you need to know how to pixelate image files before posting. The manual way? Open each photo in a photo editor, draw selection boxes around every face, apply a mosaic effect, adjust pixel size, and repeat 50 times. That's 3 minutes per photo, 5 tedious steps each, and zero room for error — miss one face and you've exposed someone's privacy. Worse, if you're handling sensitive information like ID cards or license plates, a weak pixelation effect can be reversed, turning your privacy protection into a compliance risk. AI-powered tools now detect faces and apply irreversible pixelation in 30 seconds, no desktop software expertise required.
Common Approaches to How To Pixelate Image
You have four main options for pixelating images: professional desktop software, free online tools, mobile apps, or AI-powered automation. Each method suits different needs — from quick social media edits to GDPR-compliant batch processing of sensitive information.
Desktop Editing Software (Photoshop, GIMP, Paint.NET)
Adobe Photoshop remains the industry standard for image editing with precise pixelation control. GIMP (GNU Image Manipulation Program) offers similar capabilities as a free, open-source alternative. Both programs give you manual control over pixel size and selective pixelation areas — essential when you need to redact specific faces or sensitive data in high-resolution photos.
How to pixelate images using GIMP (free):
- Download GIMP from gimp.org and open your image (File → Open)
- Select the Rectangle Select Tool from the toolbox and draw a box around the face or area you want to pixelate
- Navigate to Filters → Blur → Pixelize in the top menu
- Adjust the Pixel Width and Pixel Height values (start with 10-15 for faces, 20-30 for license plates) — higher numbers create larger pixel blocks
- Click OK to apply the mosaic effect, then export your image (File → Export As) in JPEG format or PNG format
Paint.NET (Windows-only) follows a similar workflow: Effects → Distort → Pixelate after making your selection. The interface is simpler than GIMP but offers less control over pixel block size.
The main limitation: these desktop software options require installation (GIMP is 200MB+, Photoshop needs 1-2GB), and the learning curve intimidates casual users. You're also working with manual selections — pixelating 50 faces in a group photo means drawing 50 separate rectangles. No automatic face detection. No batch processing.
Free Online Photo Editors (Canva, Pixlr, Fotor)
Online tools eliminate software installation. You upload your image, apply the pixelation effect in your browser, and download the result. Canva, Pixlr, and Fotor all offer free pixelation features with intuitive interfaces — perfect for quick edits when you don't have photo editor software installed.
How to pixelate images on Pixlr (completely free):
- Visit pixlr.com/editor and click Open Image to upload your photo
- Select the Marquee Tool (rectangle icon) and draw around the area you want to pixelate
- Go to Filter → Pixelate in the top menu bar
- Drag the Block Size slider right to increase pixel size (5-10 for subtle blur, 15-25 for complete anonymization)
- Click Apply, then File → Save to download your edited image
Facepixelizer (facepixelizer.com) specializes in privacy protection — it auto-detects faces in uploaded photos and applies pixelation automatically. Upload a group photo and it finds every face within seconds. Click individual faces to adjust the pixelation effect or exclude specific people.
The trade-off: online tools upload your photos to their servers. If you're pixelating medical records, ID cards, or other confidential documents, this creates a privacy risk. Most free online editors also compress image quality during export — your 5MB original becomes a 1MB JPEG with visible artifacts.
Mobile Apps (iPhone Photos, Blur Photo Editor)
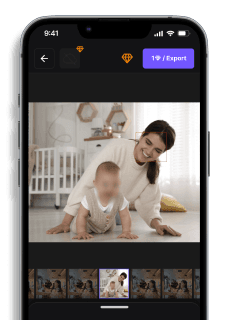
Mobile apps let you pixelate images directly on your smartphone — no computer required. The iPhone Photos app includes built-in editing tools, while Blur Photo Editor (iOS/Android) offers dedicated pixelation features.
How to pixelate images on iPhone using Blur Photo Editor (free with ads):
- Download Blur Photo Editor from the App Store and grant photo access
- Tap Select Photo and choose the image you want to edit
- Select the Pixelate tool from the bottom toolbar
- Drag your finger across faces or sensitive areas — the app applies a mosaic effect in real-time
- Adjust Blur Intensity (pixel block size) using the slider at the bottom
- Tap the checkmark icon to save your pixelated photo to your camera roll
Android users can try Photo Blur Background Editor (free on Google Play) with similar functionality. Both apps work offline — your photos never leave your device, making them safer for sensitive information than online tools.
The limitation: mobile apps struggle with batch processing. Pixelating 100 event photos means opening each one individually, drawing pixelation masks manually, and exporting one at a time. Your finger also lacks the precision of a mouse — pixelating small faces in wide-angle group shots becomes tedious.
AI-Powered Automatic Pixelation (blur.me)
AI face detection eliminates manual selection work. Upload a photo with 50 faces, and the AI detects every one automatically — then applies pixelation in seconds. blur.me runs entirely in your browser (no installation, works on macOS, Windows, Android, iPhone) with automatic face detection and batch processing.
How to pixelate images using blur.me:
- Visit blur.me/studio and drag your photo into the browser window
- AI automatically detects all faces and applies pixelation — blue bounding boxes appear around detected regions
- Click any face to toggle pixelation on/off (useful when you want to keep specific people visible)
- Switch between standard blur and pixelated mosaic effect using the style selector
- Adjust blur intensity with the slider (0-100) to control pixel block size
- Click Download to save your anonymized image (original resolution preserved, no compression)
For batch processing: upload 100 photos at once, AI pixelates all faces across every image (~3 seconds per photo), then download as a ZIP file. Processes JPEG format, PNG format, and WebP without quality loss.
The key advantage: AI handles selective pixelation automatically. You don't draw rectangles around faces — the algorithm finds them. Blue bounding boxes show exactly what will be pixelated before you download. If the AI misses a face (rare but possible), click the area to manually add pixelation.
How to Pixelate Images with AI (Blur.me)
You just uploaded 50 event photos to share online, but three strangers wandered into the background. Drag all 50 files into blur.me at once — within 5 minutes, blue bounding boxes appear around every detected face across all images. The AI catches faces at every angle: profiles, partial occlusions, even faces turned away from the camera. Click any bounding box to toggle pixelation off (maybe that's your friend who consented), adjust the intensity slider if you want heavier mosaic blocks, then hit Export. All 50 photos download with irreversible pixelation — the original pixel data is permanently destroyed, not just obscured.
Compare that to Photoshop's manual workflow: 50 photos × 5 steps each × 2 minutes per photo = 100 minutes of repetitive rectangle-drawing. Blur.me's 98%+ detection accuracy eliminates the risk of missing a face buried in the background. Upload a group photo with 20 people, and AI detects all 20 — no manual selection required. The tool runs entirely in your browser, so nothing uploads to external servers beyond the initial processing request.
Batch processing 100 photos? That's roughly 5 minutes total vs 3+ hours in traditional editors. The pixelation effect applies uniformly across all detected regions — no inconsistent cell sizes or misaligned mosaic blocks from manual filter applications.
If you're pixelating 50+ photos manually, you're spending 100 minutes drawing selection boxes around every face — and you'll still miss 2-3 faces buried in the background. Blur.me's batch upload detects all faces across 50 photos in 5 minutes, with 98%+ accuracy that catches profiles, partial occlusions, and turned-away faces automatically.
Skip the 100-minute manual workflow
batch-process 50 photos in 5 minutes with zero missed faces.
Quick Comparison: How To Pixelate Image Tools
| Feature | Blur.me | Photoshop | GIMP | Canva | Pixlr |
|---|---|---|---|---|---|
| Price | $0 (free tier), paid plans from $9/mo | $54.99/month (Photography plan $9.99/mo) | Free (open-source) | Free tier, Pro $12.99/mo | Free tier, Premium $4.90/mo |
| Face Detection | AI auto-detect (98%+ accuracy) | Manual selection only | Manual selection only | Manual selection only | Manual selection only |
| Time per 100 Photos | ~5 minutes (batch processing) | ~200 minutes (2 min per photo) | ~200 minutes (2 min per photo) | ~150 minutes (1.5 min per photo) | ~180 minutes (1.8 min per photo) |
| Platform | Browser-based (any device) | Windows, macOS (2GB download) | Windows, macOS, Linux (200MB) | Browser-based + iOS/Android app | Browser-based + mobile apps |
| Best For | Privacy redaction at scale (events, CCTV, batch jobs) | Professional designers needing precise control | Budget-conscious users with desktop access | Quick social media edits with templates | Casual users wanting mobile + web access |
Verdict: GIMP wins for free desktop users who need full control over pixelation settings and don't mind manual selection work. Photoshop justifies its cost for professionals already in the Adobe ecosystem who need advanced masking tools and non-destructive editing. Blur.me eliminates the 2-minute-per-photo bottleneck with AI face detection — upload 100 event photos and get all faces pixelated in ~5 minutes total, no manual selection required. For one-off social media posts, Canva and Pixlr offer the fastest browser-based workflow with preset pixelation sizes.
FAQ
What is the difference between pixelation and blurring?
Pixelation replaces image regions with large square blocks of averaged color — creating a mosaic effect where individual pixels become visible. Blurring smooths pixel transitions using algorithms like Gaussian blur, producing a soft, out-of-focus appearance without sharp edges. Both methods obscure sensitive information, but pixelation offers stronger visual confirmation that content is unreadable since you can count the pixel blocks. Photoshop's Mosaic filter applies pixelation, while its Gaussian Blur filter creates smooth blurring. For privacy protection, pixelation at 16×16 pixel blocks or larger prevents facial recognition, whereas light blur (radius under 20px) can sometimes be reversed using deconvolution techniques.
Can you pixelate an image for free?
Yes — GIMP (GNU Image Manipulation Program) offers professional-grade pixelation at zero cost through its Filters → Blur → Pixelize menu. Online tools like Facepixelizer and LunaPic's pixelate editor work entirely in your browser without downloads or account creation. Canva's free tier includes basic pixelation, though you'll see "Canva" watermarks on exports unless you upgrade to Canva Pro ($12.99/month). Mobile users get free pixelation through iPhone's built-in Photos app markup tools or Android apps like Blur Photo Editor. The trade-off: free tools lack batch processing and automatic face detection, so pixelating 50 faces in a group photo means drawing 50 manual selections.
How do I pixelate part of a picture?
In Photoshop, select the Rectangular Marquee Tool (M key), draw a box around the area you want to pixelate, then go to Filter → Pixelate → Mosaic and adjust the Cell Size slider until content becomes unrecognizable. For irregular shapes like faces, use the Lasso Tool (L key) to trace the outline before applying the mosaic filter — higher Cell Size values (30-50 pixels) work best for complete anonymization. GIMP users follow the same workflow: Rectangle Select Tool → Filters → Blur → Pixelize → set pixel width to 20+ for strong privacy protection. Online tools like Pixlr let you drag a selection box directly on your uploaded image, click Effects → Pixelate, and download the result in under 60 seconds.
What app can pixelate photos on mobile devices?
iPhone users can pixelate images using the built-in Photos app — tap Edit → Markup (pen icon) → draw over sensitive areas with the marker tool set to maximum thickness, though this creates colored scribbles rather than true pixelation. For actual pixel-block effects, download Blur Photo Editor (iOS/Android, free with ads) which detects faces automatically and applies adjustable mosaic effects in 10-15 seconds per photo. Android users also get Pixelate & Censor Photos app (free) with manual selection tools and preset pixel sizes ranging from 8×8 to 64×64 blocks. Canva's mobile app (iOS/Android) includes pixelation under Effects → Distort → Pixelate, but requires a Canva account and exports with watermarks on the free tier.
Is pixelation reversible?
Pixelation is mathematically irreversible when applied correctly because it permanently destroys original pixel data by averaging multiple pixels into single color blocks. A 20×20 pixel face reduced to a 5×5 mosaic loses 96% of its original information — no algorithm can recover those 380 deleted pixels. However, weak pixelation (under 10×10 blocks) can sometimes be defeated using machine learning models trained on face reconstruction, especially if the source image is high-resolution. Security researchers demonstrated in 2021 that 8×8 pixelated faces can be partially identified when the AI has access to reference photos of the person. For GDPR-compliant anonymization, use minimum 16×16 pixel blocks on faces and 20×20 blocks on license plates.
How many pixels should I use to hide a face?
Use 16×16 pixel blocks minimum for complete facial anonymization — this cell size prevents both human recognition and AI-based facial detection systems from identifying individuals. In Photoshop's Mosaic filter, set Cell Size to 20-30 for standard photos (3000×2000 resolution) and 40-50 for high-resolution images (6000×4000+) to maintain proportional pixelation strength. Smaller blocks like 8×8 still obscure identity to casual viewers but can be vulnerable to machine learning reconstruction attacks if someone has reference photos. License plates require 20×20 blocks minimum since alphanumeric characters have simpler shapes than faces and need stronger pixelation. Test your settings by zooming to 200% — if you can still distinguish facial features like eye position or mouth shape, increase the pixel block size by 50%.
Can Photoshop automatically detect and pixelate faces?
Photoshop does not include built-in automatic face detection for pixelation — you must manually select each face using the Marquee or Lasso tools before applying Filter → Pixelate → Mosaic. Adobe added AI-powered Select Subject in Photoshop 2023, which can isolate people in photos, but you still need to manually apply the mosaic effect to each selection. This workflow takes 90-120 seconds per face: draw selection (20 sec), refine edges (30 sec), apply filter (10 sec), adjust Cell Size (20 sec), deselect and move to next face (10 sec). For a group photo with 15 people, that's 22 minutes of repetitive clicking. Blur.me tracks moving faces automatically using deep learning models trained on 500,000+ face angles, detecting and pixelating all faces in uploaded photos within 3 seconds — no manual selection required.
The manual selection approach takes 2-3 minutes per face — manageable for a single portrait, but impractical when you're batch-processing event photos with dozens of people. The real bottleneck isn't the pixelation effect itself — it's detecting every face that needs protection.
Related Guides
- How to Censor a Photo Online (Fast & Free)
- How to Pixelate a Picture on iPhone Easily
- 5 Best Tools to Pixelates Faces in Images in 2025
- How to Censor Images Online (Fast & Free)
- How to Pixelate an Image on iPhone (4 Free Ways)
Pixelate 100 faces in 5 minutes
No manual selections. Blur.me auto-detects every face and applies 16×16 pixel blocks instantly.
Try Blur.me Free