Gaussian Blur Image Online
Maya Chen — Tech Writer & Privacy Advocate Part of: Blur Photo Complete Guide: Methods, Tools & Best Practices (2026)Read the complete guide →
The Gaussian blur effect is a powerful tool used by photographers, designers, and content creators to soften edges, reduce noise, or draw focus to a subject. If you want to blur a photo background, a face, or the entire image, applying Gaussian blur online is now faster and easier than ever.
In this guide, we’ll walk you through how to add Gaussian blur online, compare it to other blur effects like box blur, and show you how to use Gaussian blur in tools like Photoshop, Premiere Pro, Procreate, and CapCut.
What Is Gaussian Blur?
Gaussian blur is a smoothing filter based on the Gaussian function, which creates a soft, natural-looking blur by averaging pixels with those around them.
Unlike the simpler box blur, which averages pixel values uniformly, Gaussian blur weights pixels based on their distance from the center point, resulting in a more realistic and subtle blur filter effect.
How to Add Gaussian Blur Online (Free and Fast)
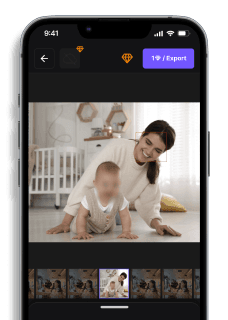
If you don’t have access to Photoshop or Procreate, don’t worry. You can apply Gaussian blur online in just a few clicks using browser-based tools like BlurMe. Here’s how:
How to Apply Gaussian Blur to Images Online with BlurMe
- Go to BlurMe's online Blur Photo Editing Studio and upload your image (JPEG, PNG, or WebP).
- Select Custom Blur to choose the Gaussian Blur effect.
- Adjust the blur intensity using the slider and apply the blur effect to the whole image or parts of the image.
- Click Export to save your blurred image.
Box Blur vs Gaussian Blur: What's the Difference?
While both Gaussian blur and box blur are used to soften images, they differ in how they process pixels. Gaussian blur creates a smooth, natural effect by weighting pixels based on distance, while box blur applies equal weighting, resulting in a harsher look. Gaussian blur is best for photo editing and background softening, whereas box blur suits quick, simple tasks. For more professional results, Gaussian blur is the better option.
You can also try the Face Blur Effect tool to auto-detect and blur multiple faces with Gaussian precision.
How to Gaussian Blur in Photoshop
If you have access to Adobe Photoshop, here’s how to apply Gaussian blur:
- Open your image
- Go to Filter > Blur > Gaussian Blur
- Adjust the Radius slider to control blur strength
- Click OK
Tip: Add a mask to apply the effect selectively.
How to Gaussian Blur in Premiere Pro (For Videos)
Want to use Gaussian blur on video clips? Here's how in Adobe Premiere Pro:
- Import your video to the timeline
- Open the Effects panel
- Drag Gaussian Blur to your clip
- In the Effect Controls panel, adjust Blurriness
- Optional: Add a mask to apply blur only to faces or areas
How to Blur on Procreate (iPad)
Procreate makes Gaussian-style blur simple:
- Select the Magic Wand icon (Adjustments)
- Tap Gaussian Blur
- Choose Layer or Pencil (for area-specific blur)
- Slide your finger to adjust intensity
Pro tip: Combine Gaussian blur with Procreate’s selection tool for even more control.
How to Blur on CapCut (Mobile Video Editing)
If you’re editing TikToks or YouTube Shorts on CapCut:
- Add your video to the timeline
- Tap Effects > Basic
- Choose Blur (Gaussian-style blur is used under the hood)
- Adjust duration and position using keyframes
Want more control? Check out our full guide on CapCut Alternatives that support Gaussian and face-specific blur online.
Faces or plates to hide in your photo?
Upload and the AI blurs them automatically in seconds.
Conclusion: BlurMe is the Best Online Gaussian Blur App
Gaussian blur is the go-to effect when you want a soft, natural result instead of blocky pixels. Photoshop, Premiere Pro, Procreate and CapCut all handle it well, but each one expects you to draw masks or set keyframes by hand. BlurMe skips that part: it runs entirely in the browser, and the AI finds what needs blurring for you.
Pick the right BlurMe feature for the job
- ✅ Faces, people, cars, license plates or text: Auto Blur detects them in photos and videos. Click any detected target to keep it visible. See how to blur faces.
- ✅ A soft background behind a sharp subject: Background Blur keeps the person in focus and blurs everything else. In photos, you can also make the background transparent. Guides: photo background blur and video background blur. For app comparisons, see our background blur apps roundup.
- ✅ One specific person or object: Magic Blur selects the exact outline and blurs only that shape. See the Magic Blur guide.
- ✅ Logos, signs, screens or any area you draw: Manual Blur lets you draw a rectangle, ellipse or polygon. In videos, Auto Track follows that area across frames, so you don't need keyframes. See tracking moving objects.
Why it beats manual editors
You can choose Blur, Mosaic or Color separately for each target. In videos, you can limit a blur to a chosen time range and review every AI detection before export. The workflow is three steps: Upload, Auto-detect, Download.
For redaction jobs where you need to hide identities, see our face blur apps comparison.
To apply Gaussian blur to any image right away, open BlurMe Studio. Uploading and previewing are free.
Faces or plates to hide in your photo?
Drop a photo or video in your browser and the AI auto-blurs faces, license plates, and personal info in seconds.
Upload free